
Hello everybody!
I am back after finishing class 9, Easy die cutting, given by the wonderful and great Yana Smakula! Every die in her hands transforms a card in a masterpiece. So I loved learning from her.
She told a lot about the basics of die cutting, and what you can do with a die next to die cutting.
For example; You can also die vellum and make beautiful creations with it.
Pro tip: I use vellum as the shadow of sentiments. When you put an extra layer of the sentiment under the vellum, it looks like the vellum is floating.
But you can also do stenciling with your dies and embossing. You can make complete backgrounds with these both techniques.
Last for now, there is also negative die cutting and inlaid die cutting.
A few of these techniques I used for my card. I will tell you all about it!
My card is a 5 by 7 white card. I started with a lilac piece of cardstock, a bit smaller then the mentioned 5 by 7. Above the lilac cardstock I started to work with a slightly smaller piece of Neenah solar white cardstock.
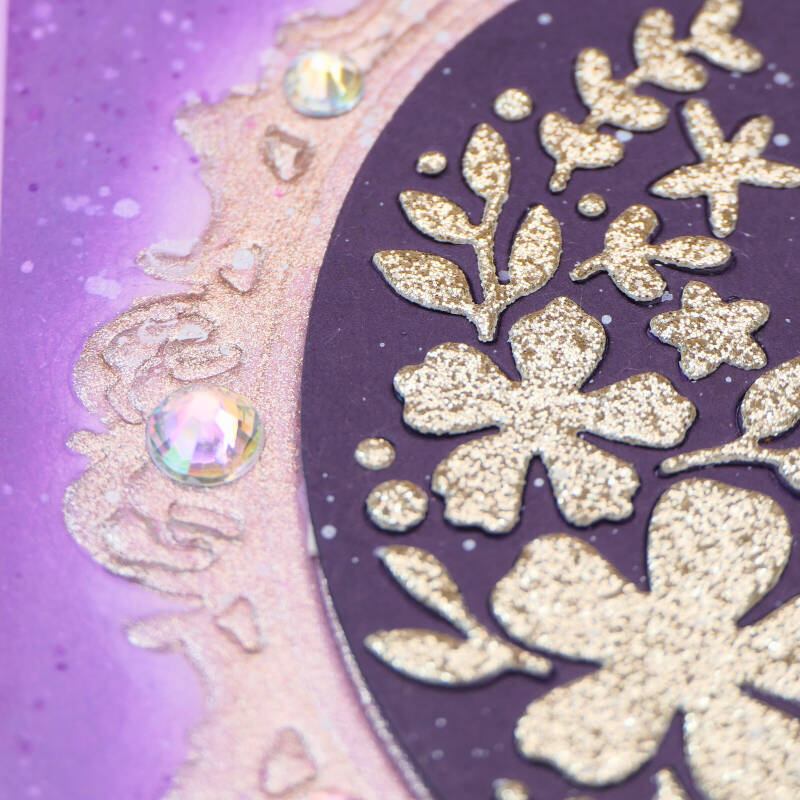
I took my Sparkled frame die and used it to emboss on my cardstock. Therefore I used the embossingmat and plate in the sandwich on my diecutting machine. Pro tip: Never force a sandwich through your machine. If it doesn't pass smoothly, try another sandwich or look in the instructions from your machine. We want our machines to live a long time.
I used Shimmer relief paste "rose gold" to give my embossed frame some shine and color.
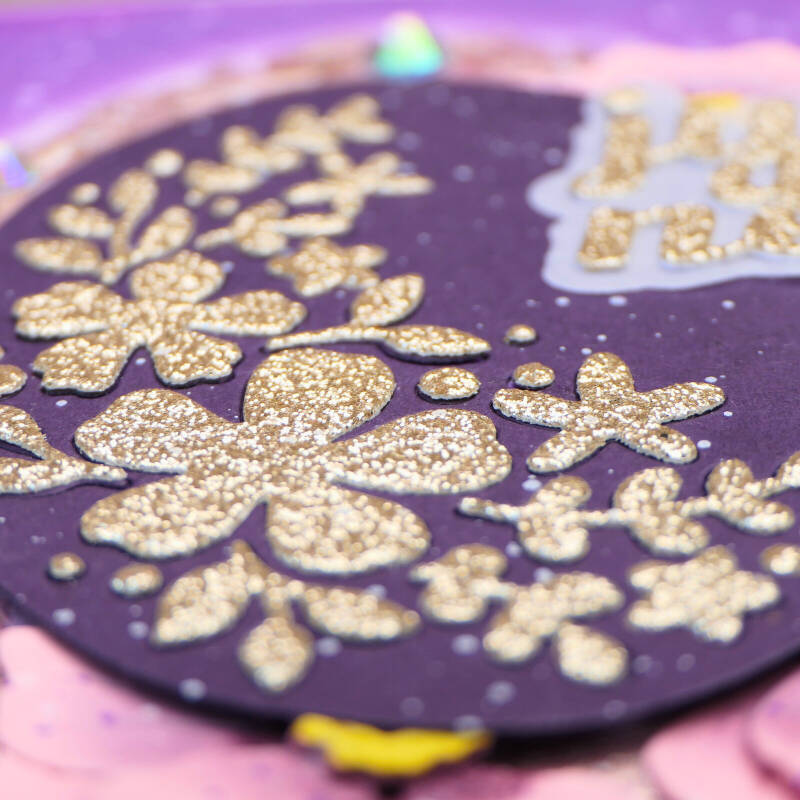
Next I took the Zero waste: Oval Serenity die set. I used both dies on dark purple cardstock and I left the tiny die cuts in the oval and secured it on the back so they would stay in place. Again I took the die with the tiny pieces, but this time on gold glitter cardstock. I glued these glitter pieces exactly over the purple ones, so they are on top of the oval. Last I attached the oval with foamtape in the middle of my embossed frame.
The cardstock outside of the frame I inkblended with inks from the "Shades of purple" ink family. Lighter to the middle and darker to the edge of the cardstock.


After the inkblending, I die cut some flowers of the lovely die set Cute open rose. I used soft pink for this and yellow for the hearts of the flowers. I inkblended the petals with the same purple as I mentioned earlier to give them some depth and dimension. I tried to arrange them on my card, but I wasn't happy with it. With fear and trembling 😅 I cut my flowers in half and slided the half flowers under the oval. That was much better!
And then it was time for some splattering, I used dark purple and the earlier mentioned rose gold shimmer relief paste, thinned with a bit of water.
The sentiment I cut out the same gold glittercardstock and the shadow I cut out of vellum and of course I used my own tip, to let it look like the vellum is floating above the cardstock. I hope you can see what I mean on the photo.
Last I used some Iridescent chrystals gem sparkles to complete this card!

I really hope you like my card and enjoy reading this blog!
Thank you so much for your time.
All links above are affiliate links, by clicking on them and making a purchase by that company, I will receive a small commission at no extra cost to you! Thank you so much for your support, I greatly appreciate it.
Add comment
Comments
WOW! It looks as if your card is glowing! Beautiful!
Thank you so much for your sweet message, Erum!