Hello my crafty friends!
Angelique here with another handmade project for you! I thought it would be nice to start a little countdown to Christmas on the Kat Scrappiness blog together. 🎅
Everyone is busy finishing their handmade Christmas cards, and maybe the cards I’ll be sharing in the coming period until Christmas will give you some extra ideas and inspiration. Of course, I’ll include step-by-step explanations and a list of all the craft supplies I used – all from Kat Scrappiness!
So I love to read in the comments, how far are you with your Christmas cards for this year?
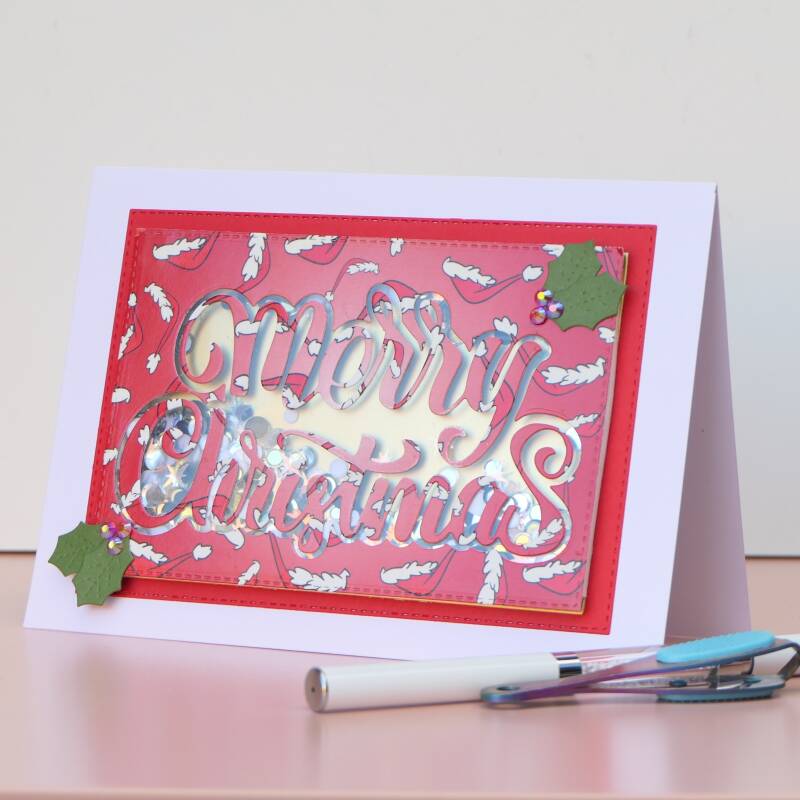
Now, back to today’s card – an easy and festive christmas shaker card! Everybody loves a good shaker card, right? The big star of this design (literally!) is a large sentiment.

🧰 Kat Scrappiness Supplies Used:
- Merry Grouchmas 6×6 Paper Pad
- Stitched Rectangle Craft Dies
- (Large) Merry Christmas Shadow Sentiment Craft Die
- Layered Christmas Baubles Craft Dies
- Celebration Solid Confetti Sequin Mix This one isn’t avaliable at the moment, but you can use any sequins or mix you want
- The North Star | Starlight Sequins
- Ruby Red Rhinestone Mix
- Acetate
📋 Card Details:
The finished shaker card measures 5″ x 7″, but the shaker element itself is based on 4¼” x 5½”. You can decide whether to make it a full 5×7 card or keep it a bit smaller, whatever fits your style best!
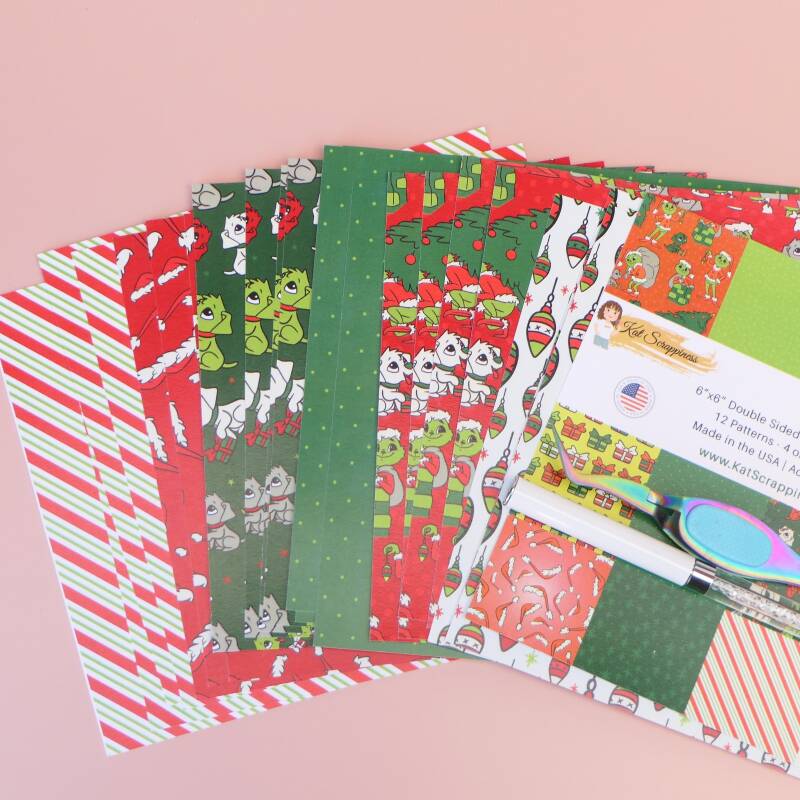
- I started by choosing the patterned paper I wanted from the Paper Pad. I picked a festive design with a repeating Christmas image and cut it using the largest die from the Stitched Rectangle Craft Dies.
- Next, I cut a piece of gold cardstock with the same die, this piece will be the bottom part of the shaker.
- From a bright red piece of cardstock, I cut a mat layer about half an inch wider than the gold piece, and set it aside for later. This step is only when you go for the 5×7 card.
- Then, I placed the shadow part of the large Merry Christmas Dies right in the center of the festive cardstock – I just eyeballed it! And die cut it.
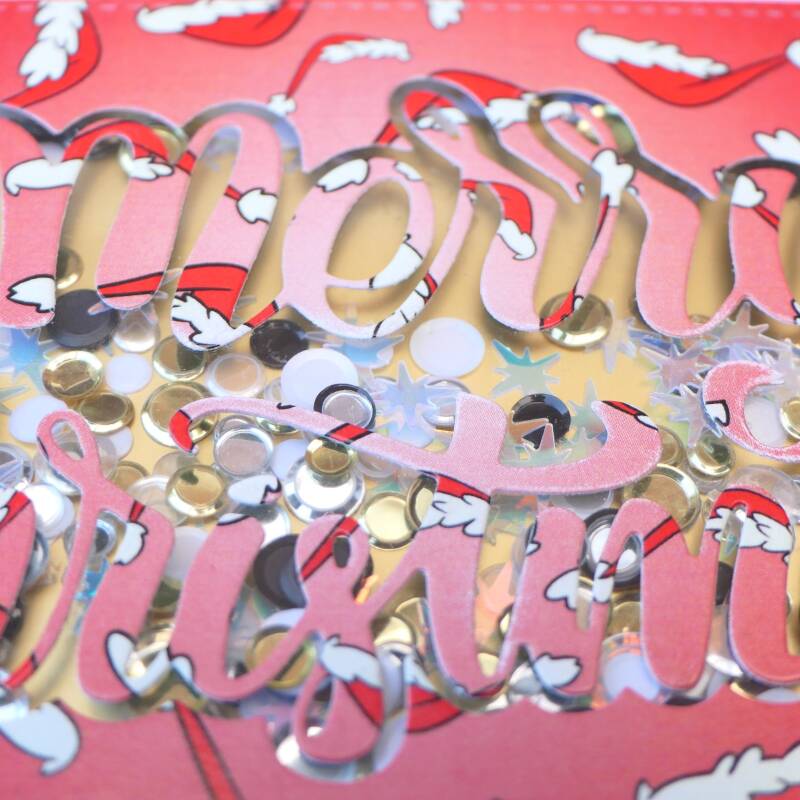
- From the piece that was cut out, I die-cut the sentiment itself.
Tip: Keep every little piece you’ll need, including the dot of the “i”!

- Next, I cut a piece of acetate slightly larger than the opening of the sentiment window and adhered it to the back of the festive panel using strong red tape (it holds really well!).
- I adhered the sentiment on the front to the acetate.
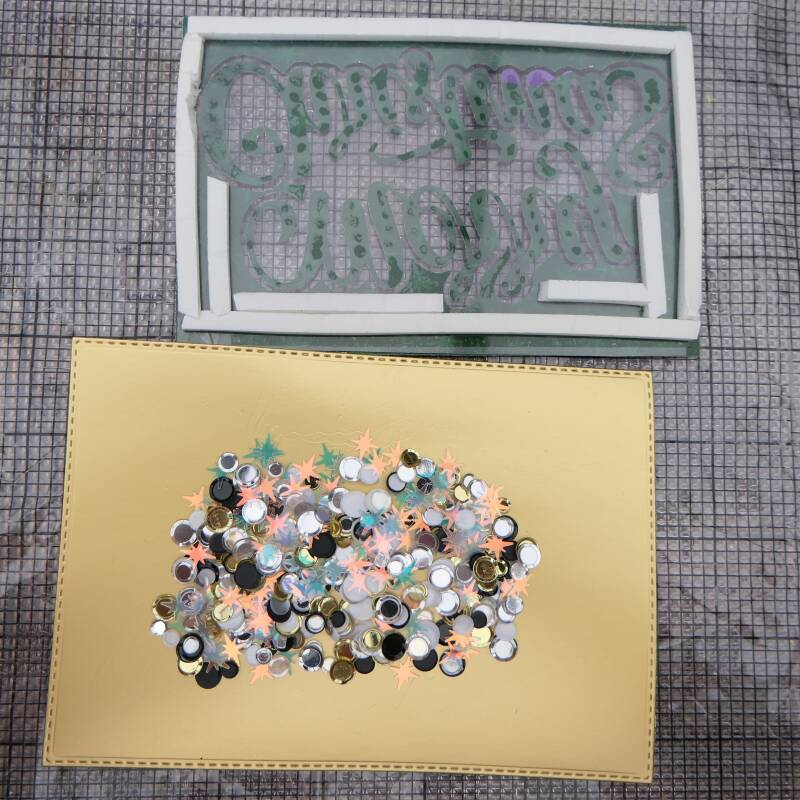
- Then, I added foam tape around the edges on the back to create the shaker frame. If your foam tape is a bit too wide, trim it so it won’t show from the front.
Tip: Before removing the backing of the foam tape, lightly dust the inside edges with anti-static powder (the same powder you use before heat-embossing). This helps prevent the sequins from sticking to the sides. - Now the fun part! I filled the shaker with sequins and a bit of the North Star Sequins, then sealed it by adhering the gold panel behind it.
- If you’re making the 5×7 version, adhere the shaker panel onto the red mat, and then attach everything to a white card base.
- To decorate, I die-cut four holly leaves from green cardstock using the Layered Christmas Baubles Craft Dies and arranged them around the sentiment.
- For the finishing touch, I added three red rhinestones next to each pair of holly leaves.
And that’s it!
I really hope you like my version of an easy handmade Christmas shaker card, and I would love to know if you give it a try!
Thank you so much for stopping by – I hope to see you for the next blog.
And don’t forget to check out What’s NEW in Kat’s Shop for more Kat Scrappiness Amazingness!
Hugs,
Angelique 👼
Add comment
Comments