Hello my lovely crafty friends!
Today I’m happy to share this shaker card I made for the Kat Scrappiness blog. This time I created a baby card in green tones, featuring one of the Essential Card Builder Dies and one of the adorable Woodland Critters — the squirrel. Isn’t he just the cutest?
For this Baby shaker card I also used the Love is in the Air stencil, the Stitched Nesting Hexagon Dies, a sweet sentiment from the Hello Sweet Baby stamp set, and a beautiful sequin mix.
I always enjoy trying different card layouts, but with a good shaker card you never go wrong. I always love making them and I surely hope you will like it too.
So let’s dive in and I’ll guide you through all the details to recreate this card.

✂️ Card Measurements
This card measures 5 x 7 inches.
Card Base & Layers:
- Card base: 5 x 7 inches
- Dark green layer: 4 1/2 x 5 3/4 inches
- 2x Light green layers: 4 1/4 x 5 1/2 inches (cut with the Essential Card Builder Dies)
- White cardstock: 4 1/4 x 5 1/2) inches
- Acetate: 4 1/4 x 5 1/2 inches
Hexagon Layers:
- Dark green: size 3 (from large to small)
- White: size 4
🛍️ Kat Scrappiness Products Used
- Sentiment Shoppe Within the Fold: "Hello Sweet Baby" 6x6 Stamp Set - New Release!
- Woodland Critters Stamp Set
- Love is in the Air 6x6 Stencil
- Kat's Essential Card Builder Craft Dies
- Stitched Nesting Hexagon Dies
- Card Shoppe Essentials Clear Acetate Sheets 8.5 x 11 - 10Pkg by Spellbinders
- Tsukineko Full-Size VersaMark Clear Embossing Ink Pad
- Lime Fairydust Sequin Mix
- Fairydust Sequin Mix
Step-by-Step Card Tutorial

I started by stenciling the hearts from the Love is in the Air Stencil onto the white cardstock using two shades of green ink. After that, I outlined the hearts with a black fineliner for a playful look.
Next, I die cut the panel using the Essential Card Builder Dies. Pay attention to how you place the dies, so the hearts stay aligned nicely when assembling the card.
I adhered the light green frame onto the dark green background and then placed the smaller pieces back into their correct positions.
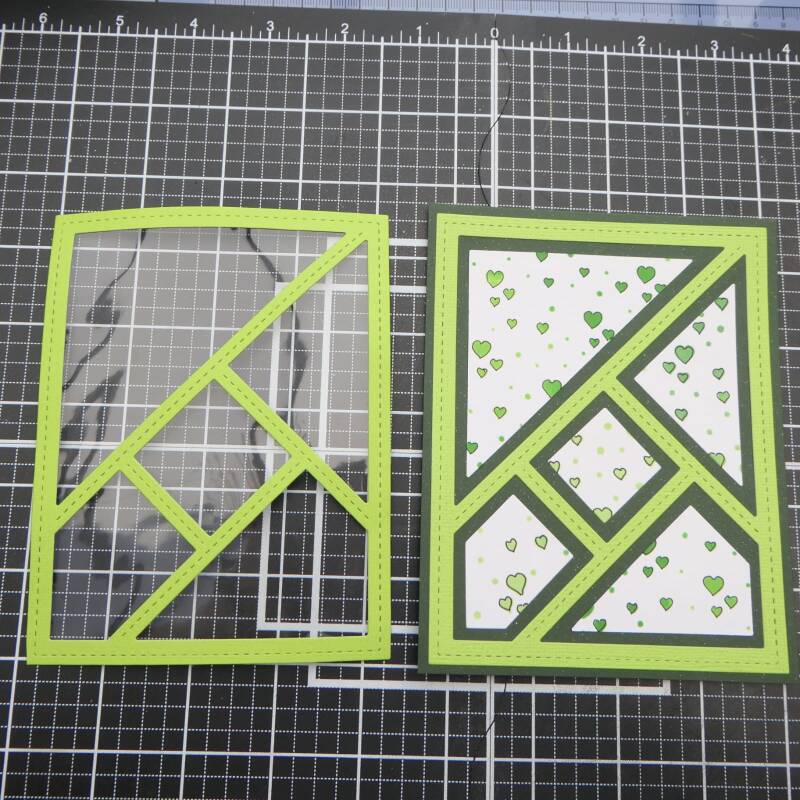

For the shaker panel, I adhered the second light green frame onto the acetate using strong double-sided tape. Then I added foam tape to the back, including a few extra pieces in the center for stability.
Before assembling the shaker, I used an anti-static powder tool on the acetate and foam tape edges. This helps prevent the sequins from sticking.
After cleaning the acetate, I added the Lime Fairydust Sequin mix to the background and closed the shaker panel. Since it’s a baby card, I kept the shaker mix light and subtle.
Focal Point & Sentiment
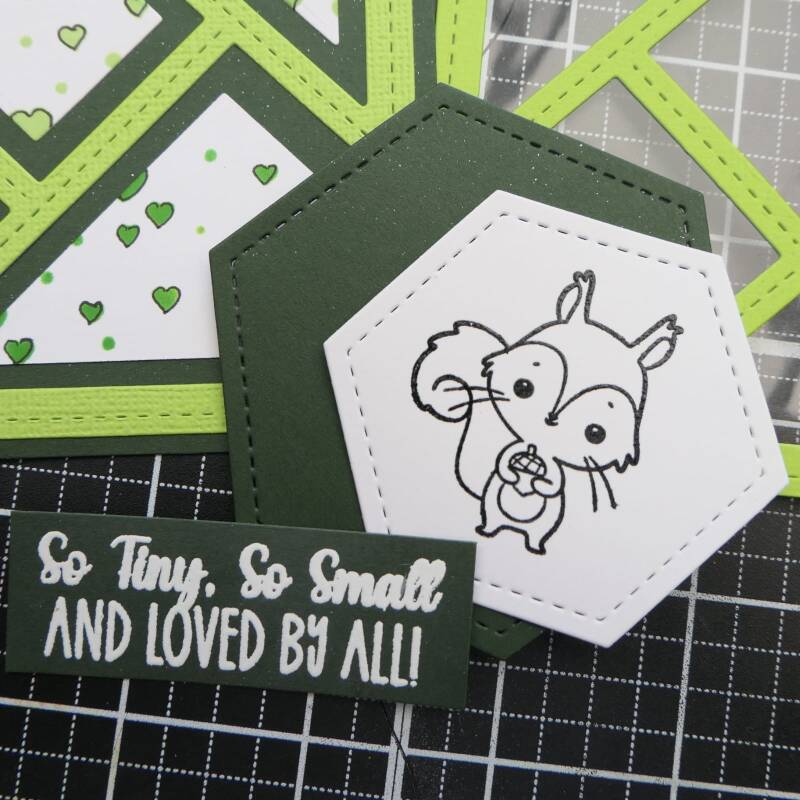
I stamped the squirrel from the Woodland Critters Stampset onto the white hexagon, heat embossed it with clear embossing powder, and colored it with alcohol markers. I ink blended the edges for extra depth.
The sentiment was stamped onto dark green cardstock using VersaMark ink and heat embossed with white embossing powder.
Tip: Always use an anti-static tool before heat embossing — it really makes a difference!
I adhered the white hexagon slightly turned on top of the dark green hexagon and placed it in the center of the card.

Finishing Touches
I placed the shaker panel onto the card base and added the sentiment with foam tape so it sits nicely leveled with the shaker.
To finish the card, I added a few small stars and hearts from the sequin mix for extra detail.
Final Thoughts
This card was so much fun to make — you know I love a good shaker card!
With the green tones, I wanted to create a baby card that feels just a little bit more “playful and bold” compared to softer pastel designs.
I hope I’ve inspired you to create a baby card with a different twist!
Thank you so much for stopping by, and don’t forget to check out the new releases at Kat Scrappiness for more inspiration.
Until next time and happy crafting!
With love and creative joy,
Angelique 🤍
Affiliate note:
The links used on the products are affiliate links. If you choose to shop through them, I may receive a small commission at no extra cost to you. Thank you for supporting my creative journey.
Add comment
Comments