Hello, my crafty friends!
Today I’m sharing a birthday card that looks quite clean on the outside, but opens into a playful little scene inside.
I really enjoyed building this card because it combines a simple front with an interactive surprise when you open it. The sweet Hundred Acre Quokka characters make it extra joyful, and each part of the card tells a little story.
I always enjoy cards that tell a little story, and this one became exactly that—soft on the outside, playful once opened.
So Let’s get started and I’ll show you exactly how this card came together.
🛍️ Kat Scrappiness Products Used:
These are no affiliate links this time, but direct links to the webshop.
- Hundred Acre Quokka Stamp Set
- Hundred Acre Quokka Coordinating Dies
- Hundred Acre Quokka 6x6 Paper Pad
- Hundred Acre Honeycomb Background Craft Die
- Hundred Acre Bee Hive Background Craft Die
- Fall Frame Craft Dies
- Stitched Nesting Hexagon Dies
- Scene Builder 6x6 Stencil
- Ink Soft Blending Brushes
- Bow-tiful Happy Birthday Shadow Sentiment Craft Dies
Step-by-Step Card Tutorial
Preparing the images
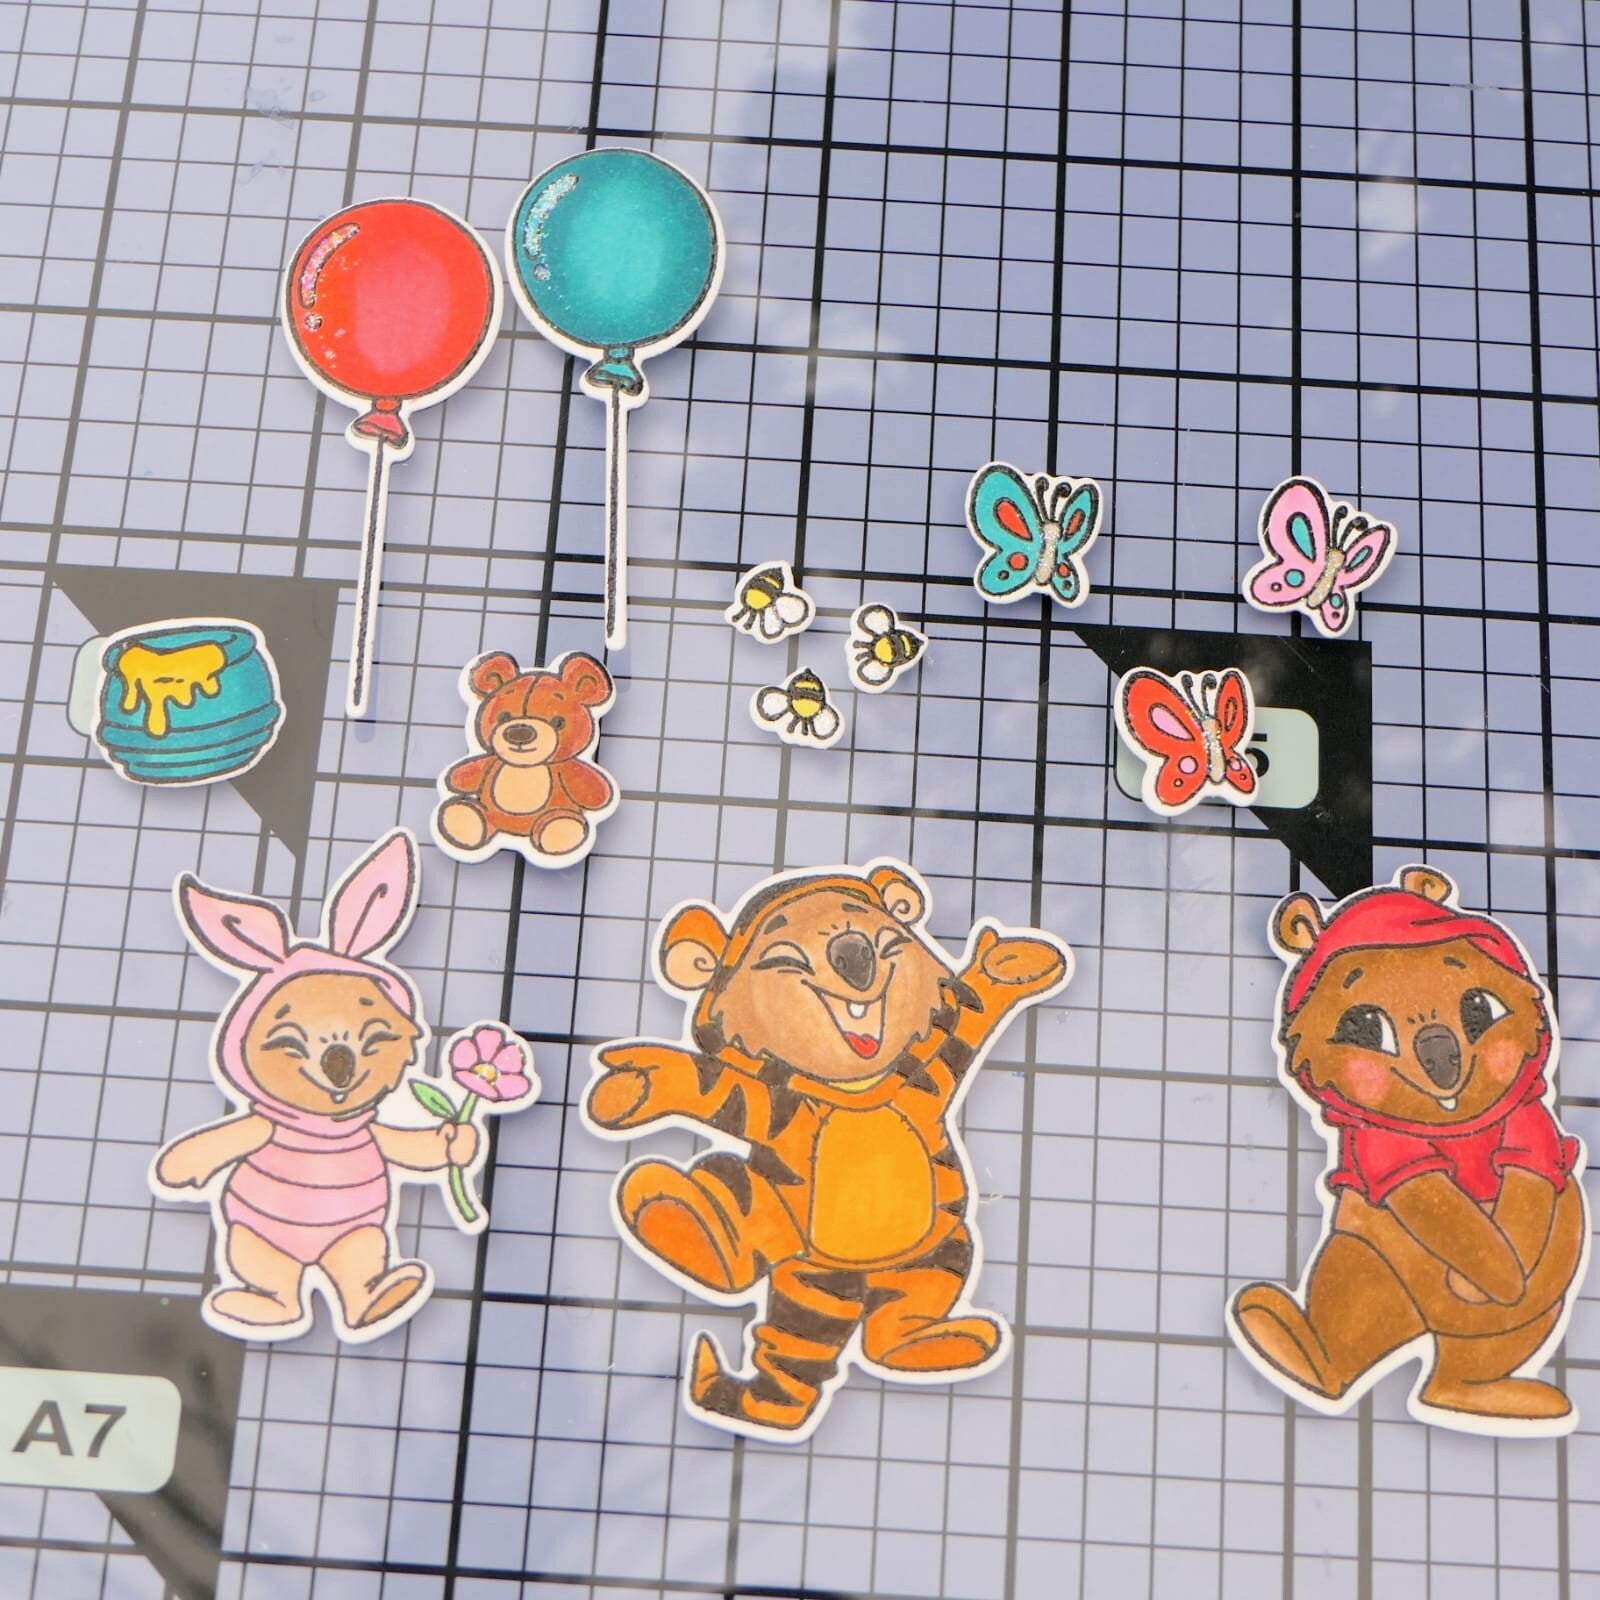
Start by stamping the following images from the Hundred Acre Quokka Stamp Set in black ink and heat emboss them with clear embossing powder:
- Quokka dressed as Winnie
- Quokka dressed as Piglet
- Quokka dressed as Tigger
- 3 butterflies
- 2 balloons
- honeypot
- bear
- 3 bees
Color all images in the colors of your choice and die cut them with the coordinating dies.
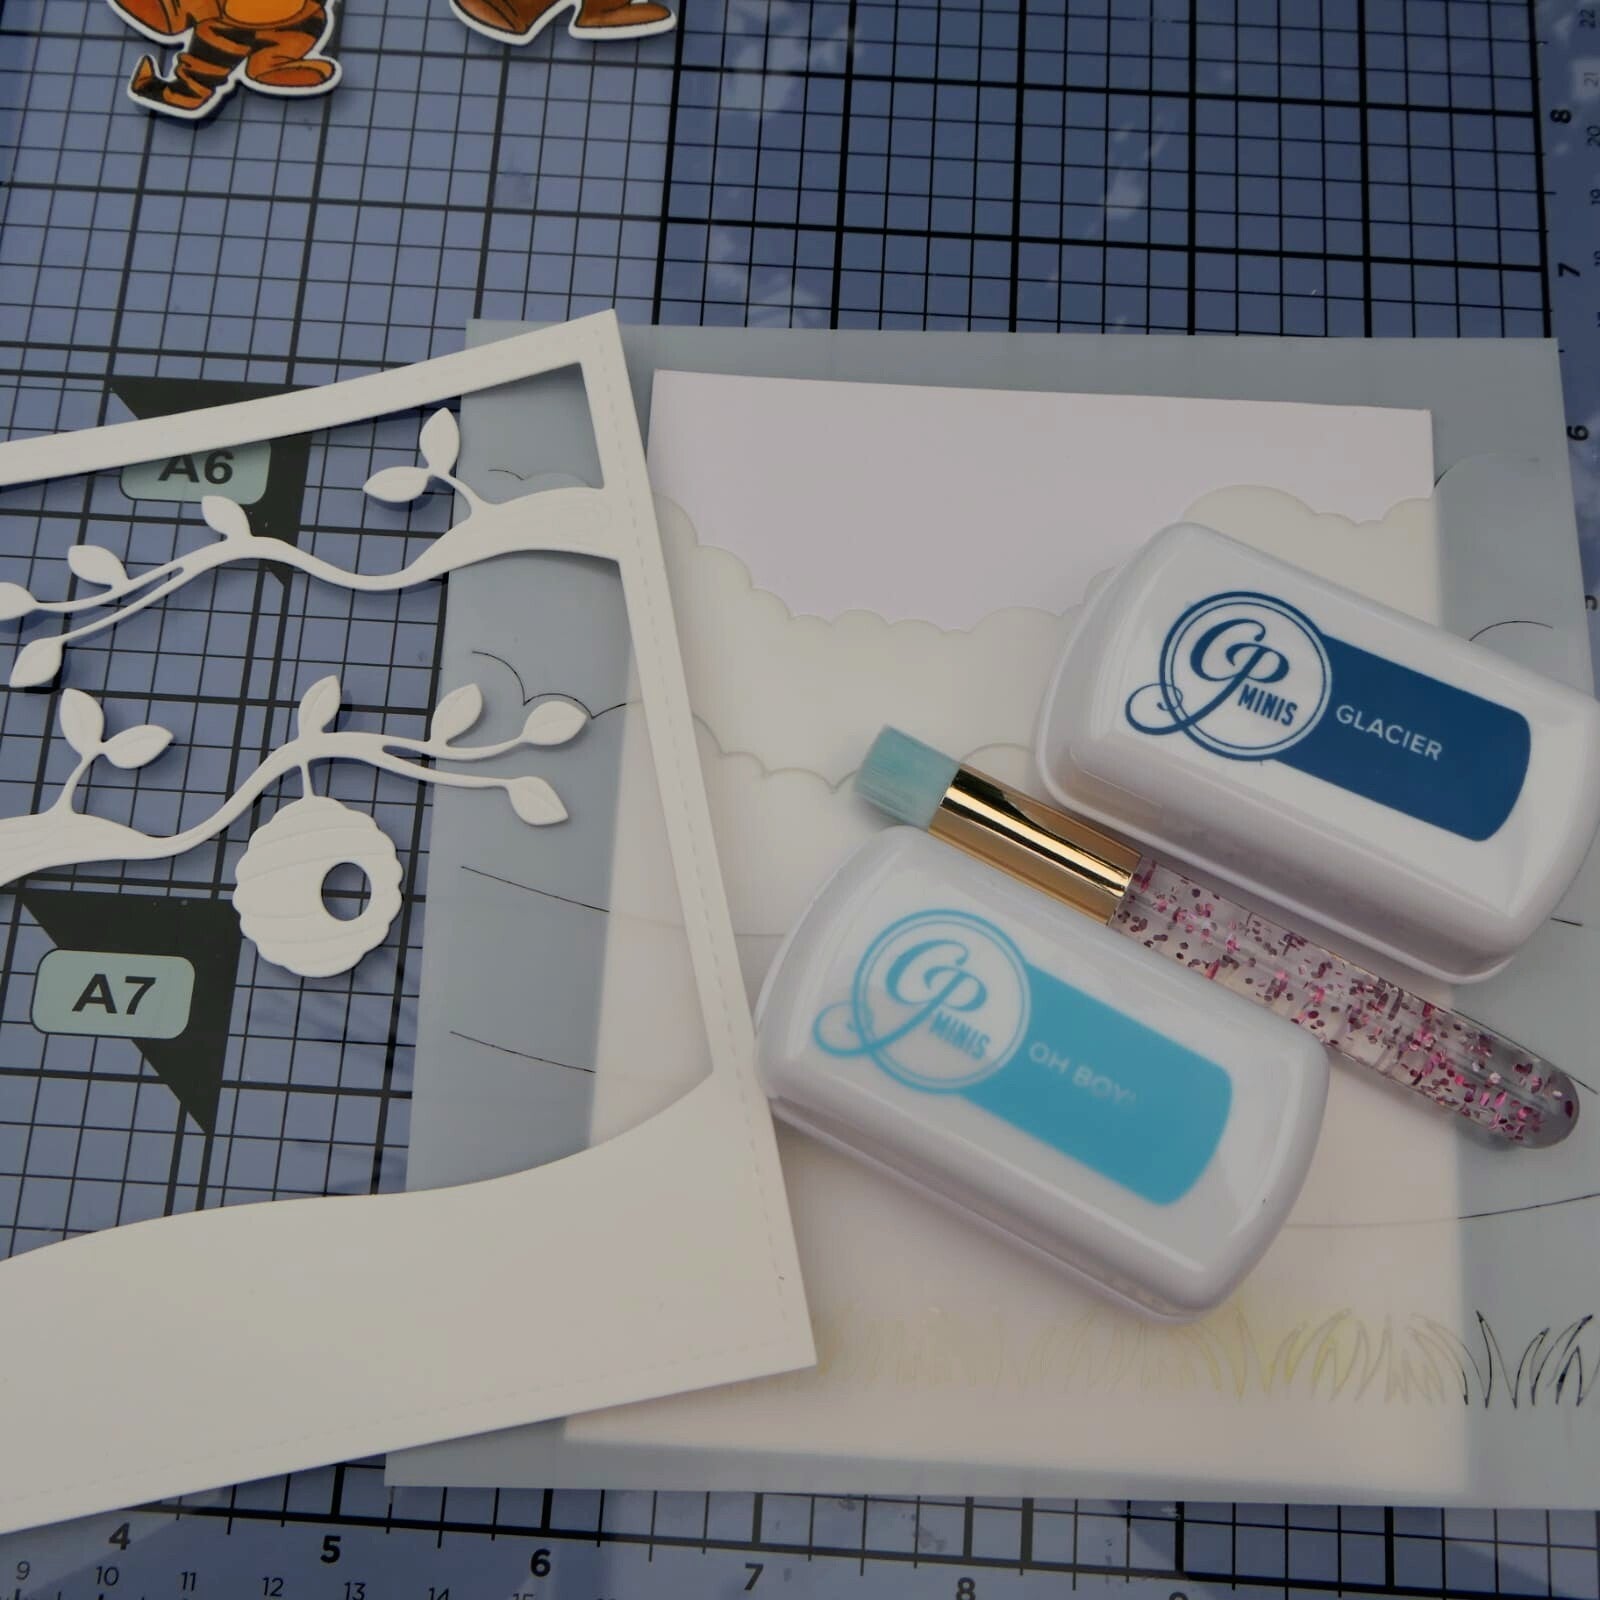
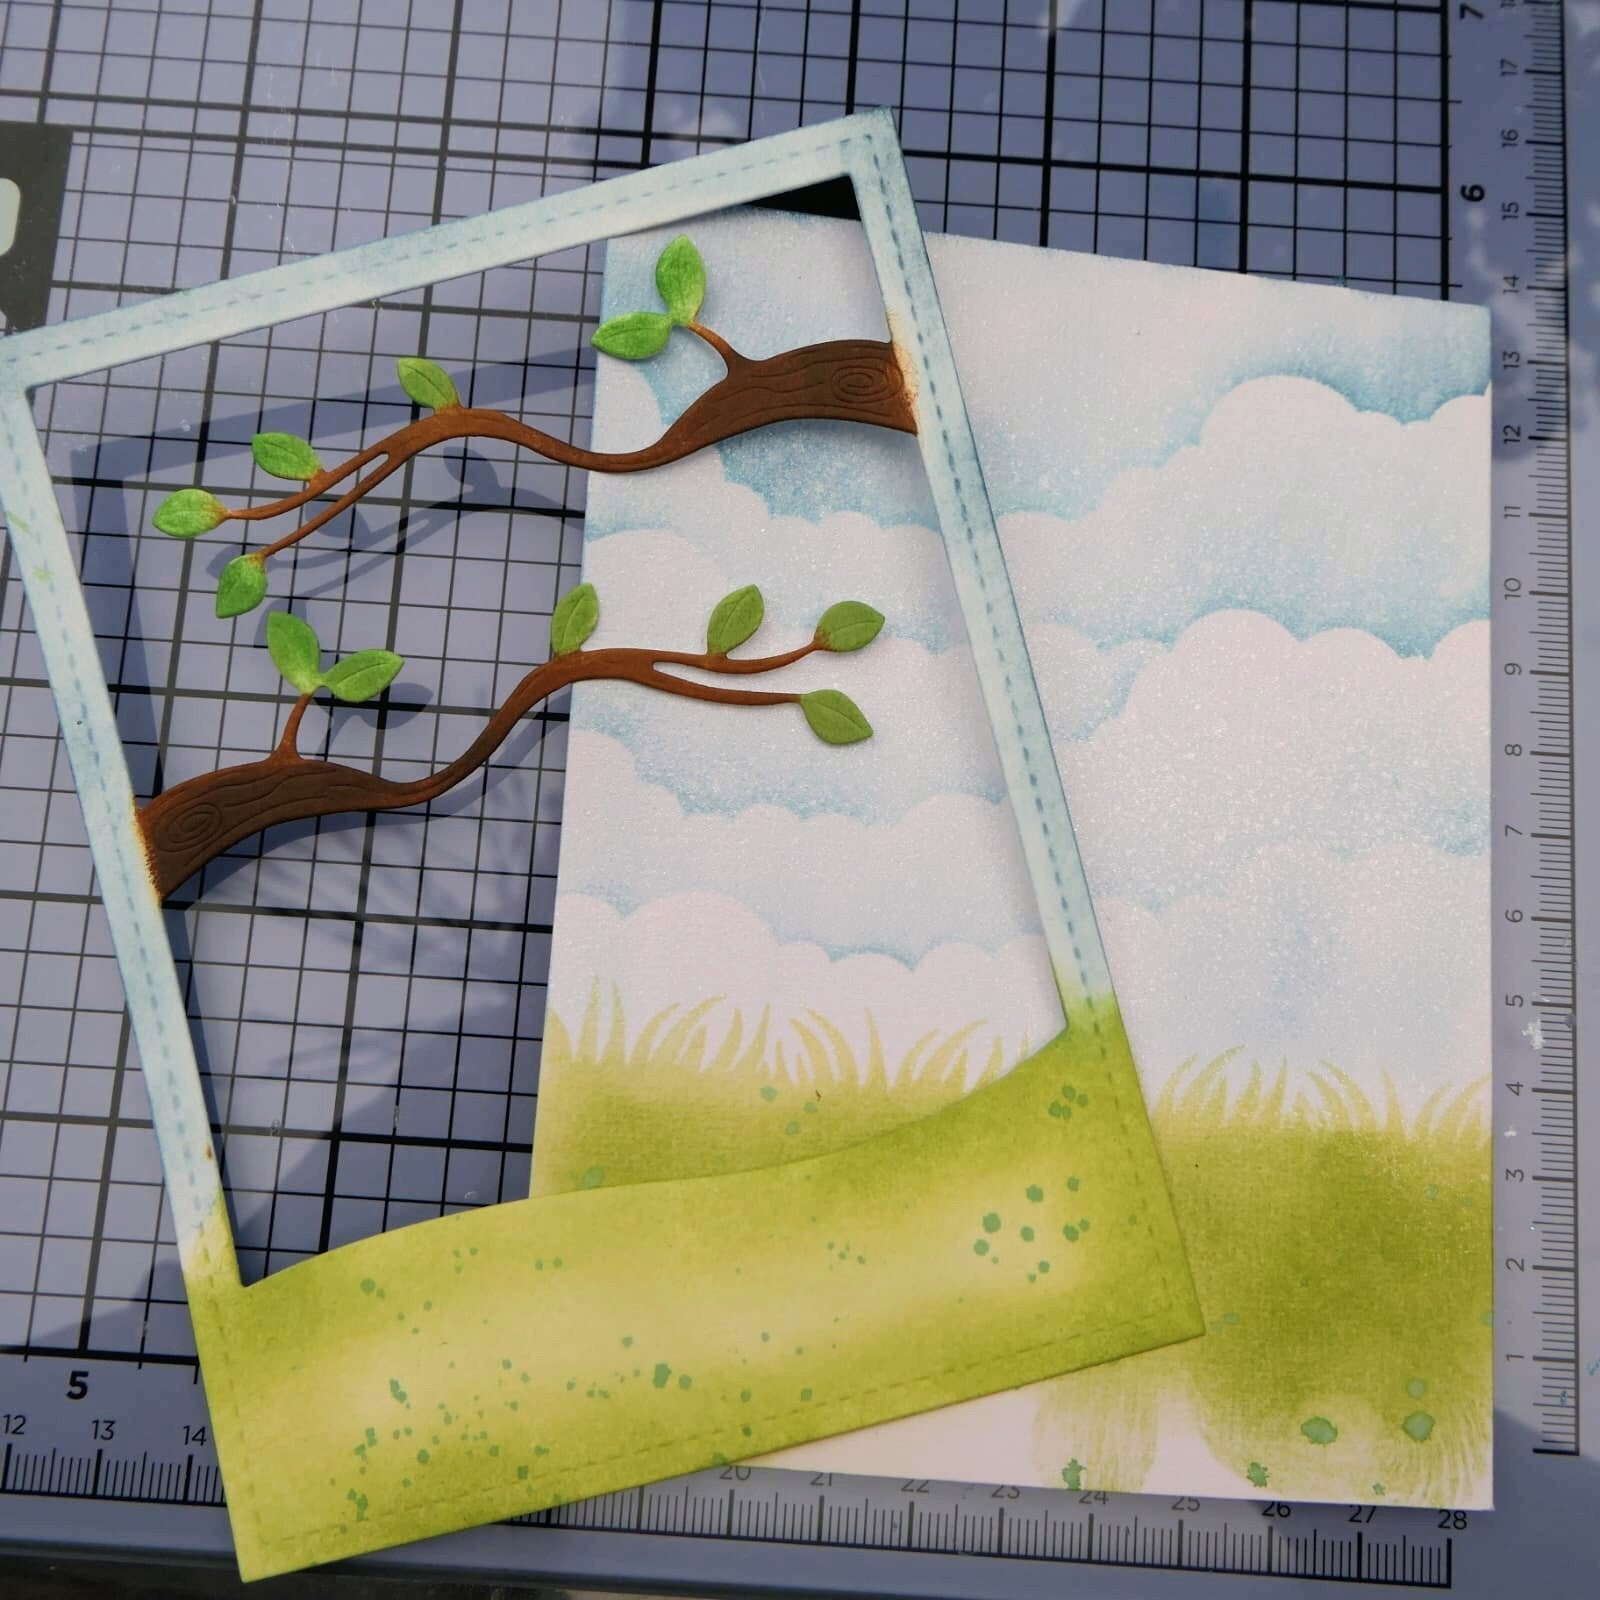
Creating the inside background
Take one A2 card base and start building the inside scene. You build the backgroundon the back of the card base!
Using the Scene Builder stencil, blend soft blue clouds from the top downward.
Before blending too far down, place your Bee Hive panel (you die cut white cardstock with the Hundred Acre Bee Hive Background Die) loosely on the card front as a guide, so you know where the clouds should stop.
Next, use the grass part of the stencil to blend soft grass below the clouds. Let the grass begin slightly higher than the bottom edge of the Bee Hive panel, so the final scene feels natural and layered.
Softly ink blend the Bee Hive panel piece so it fits the inside scene better.
For my design I trimmed away the small honeycomb because I wanted it to fit the scene better, but you can leave it whole if you prefer.
Adhere this panel onto the ink blended inside background.
This becomes the main center scene of your card.
Preparing the little honeycomb panel for behind Tigger
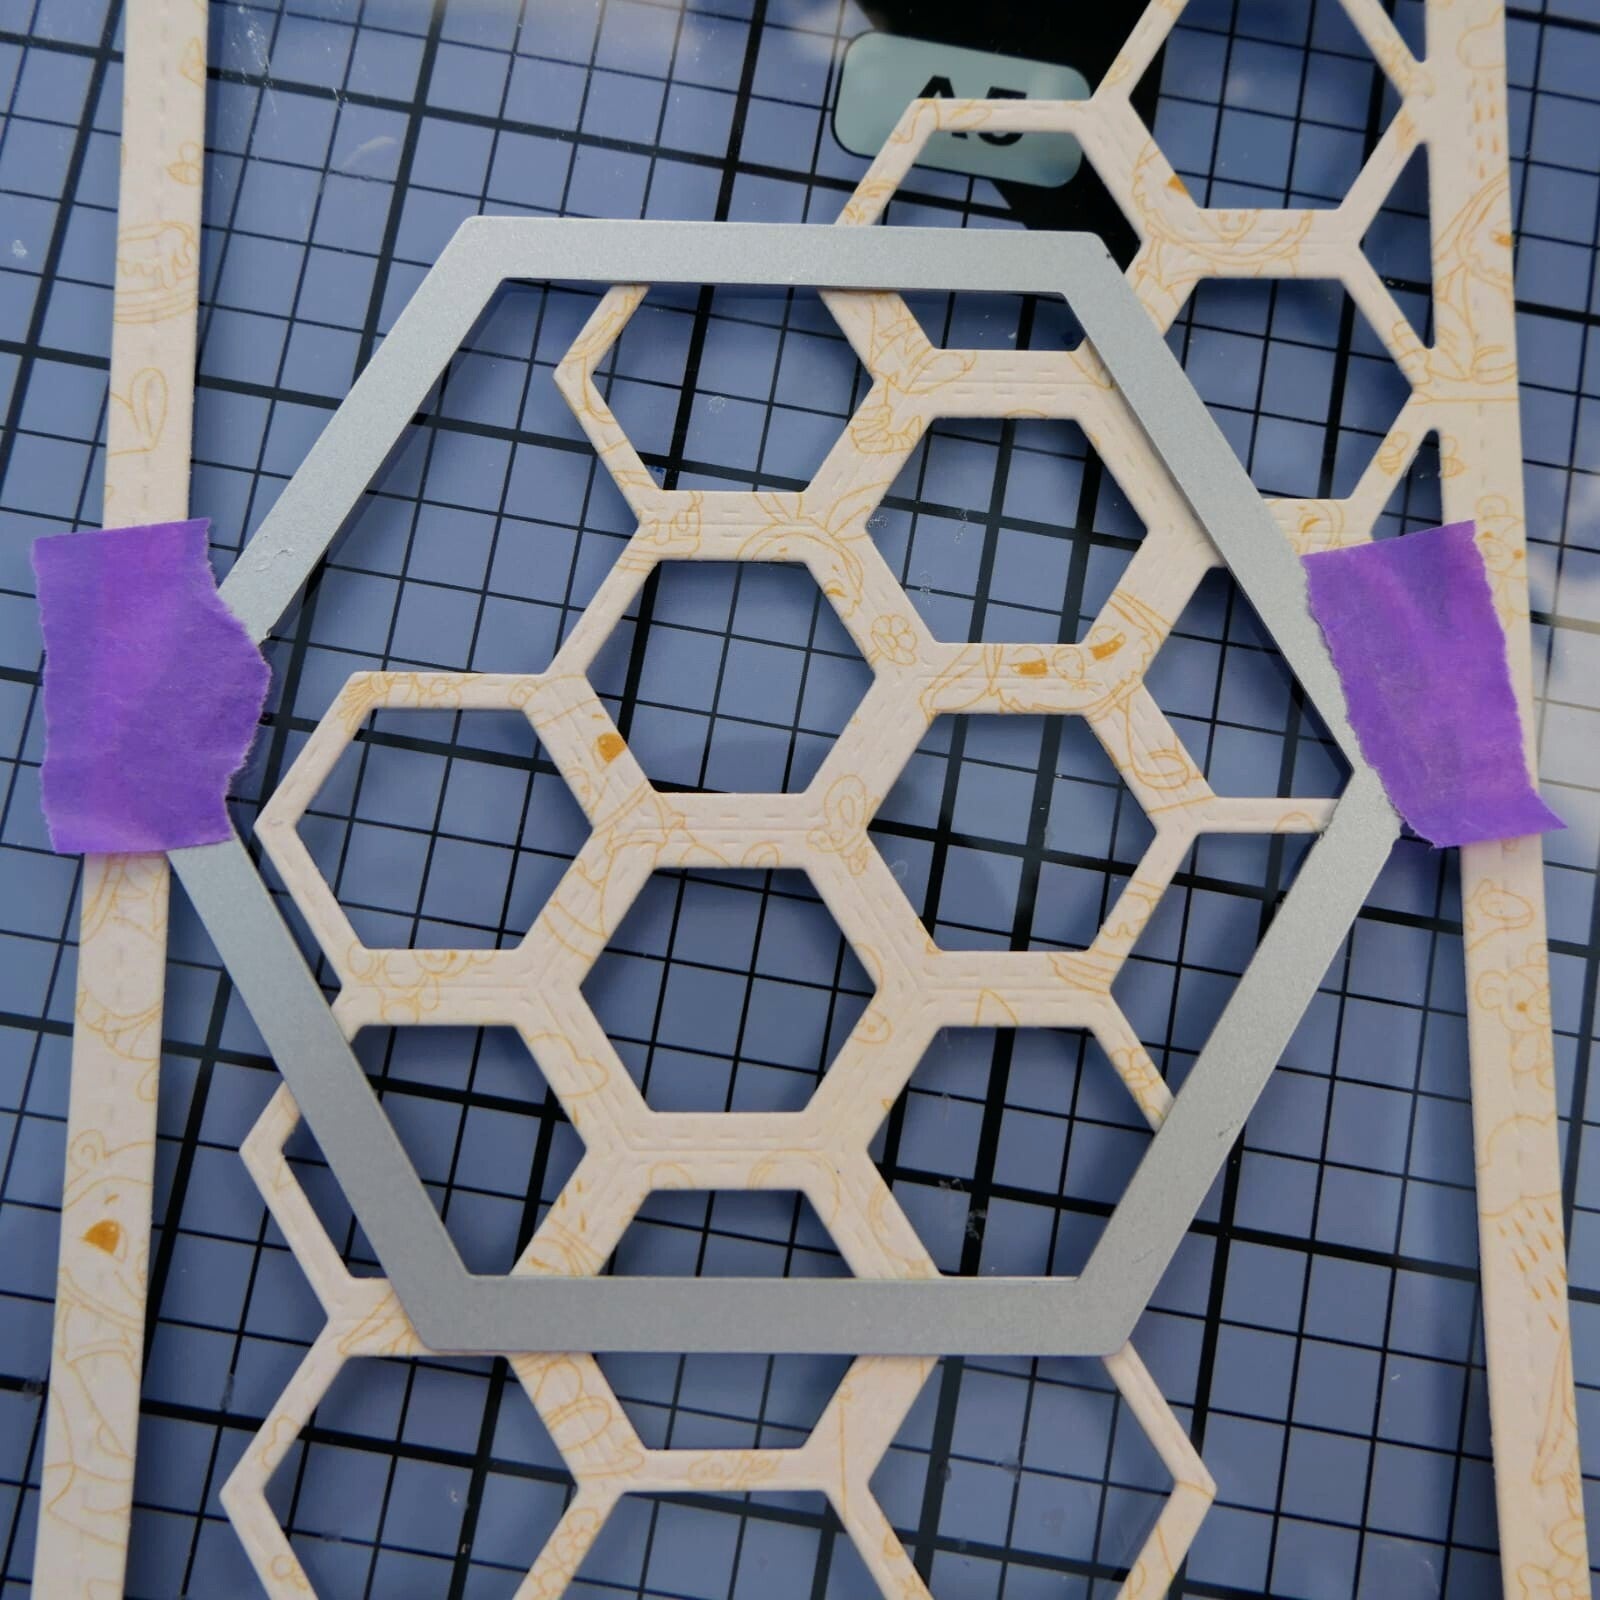
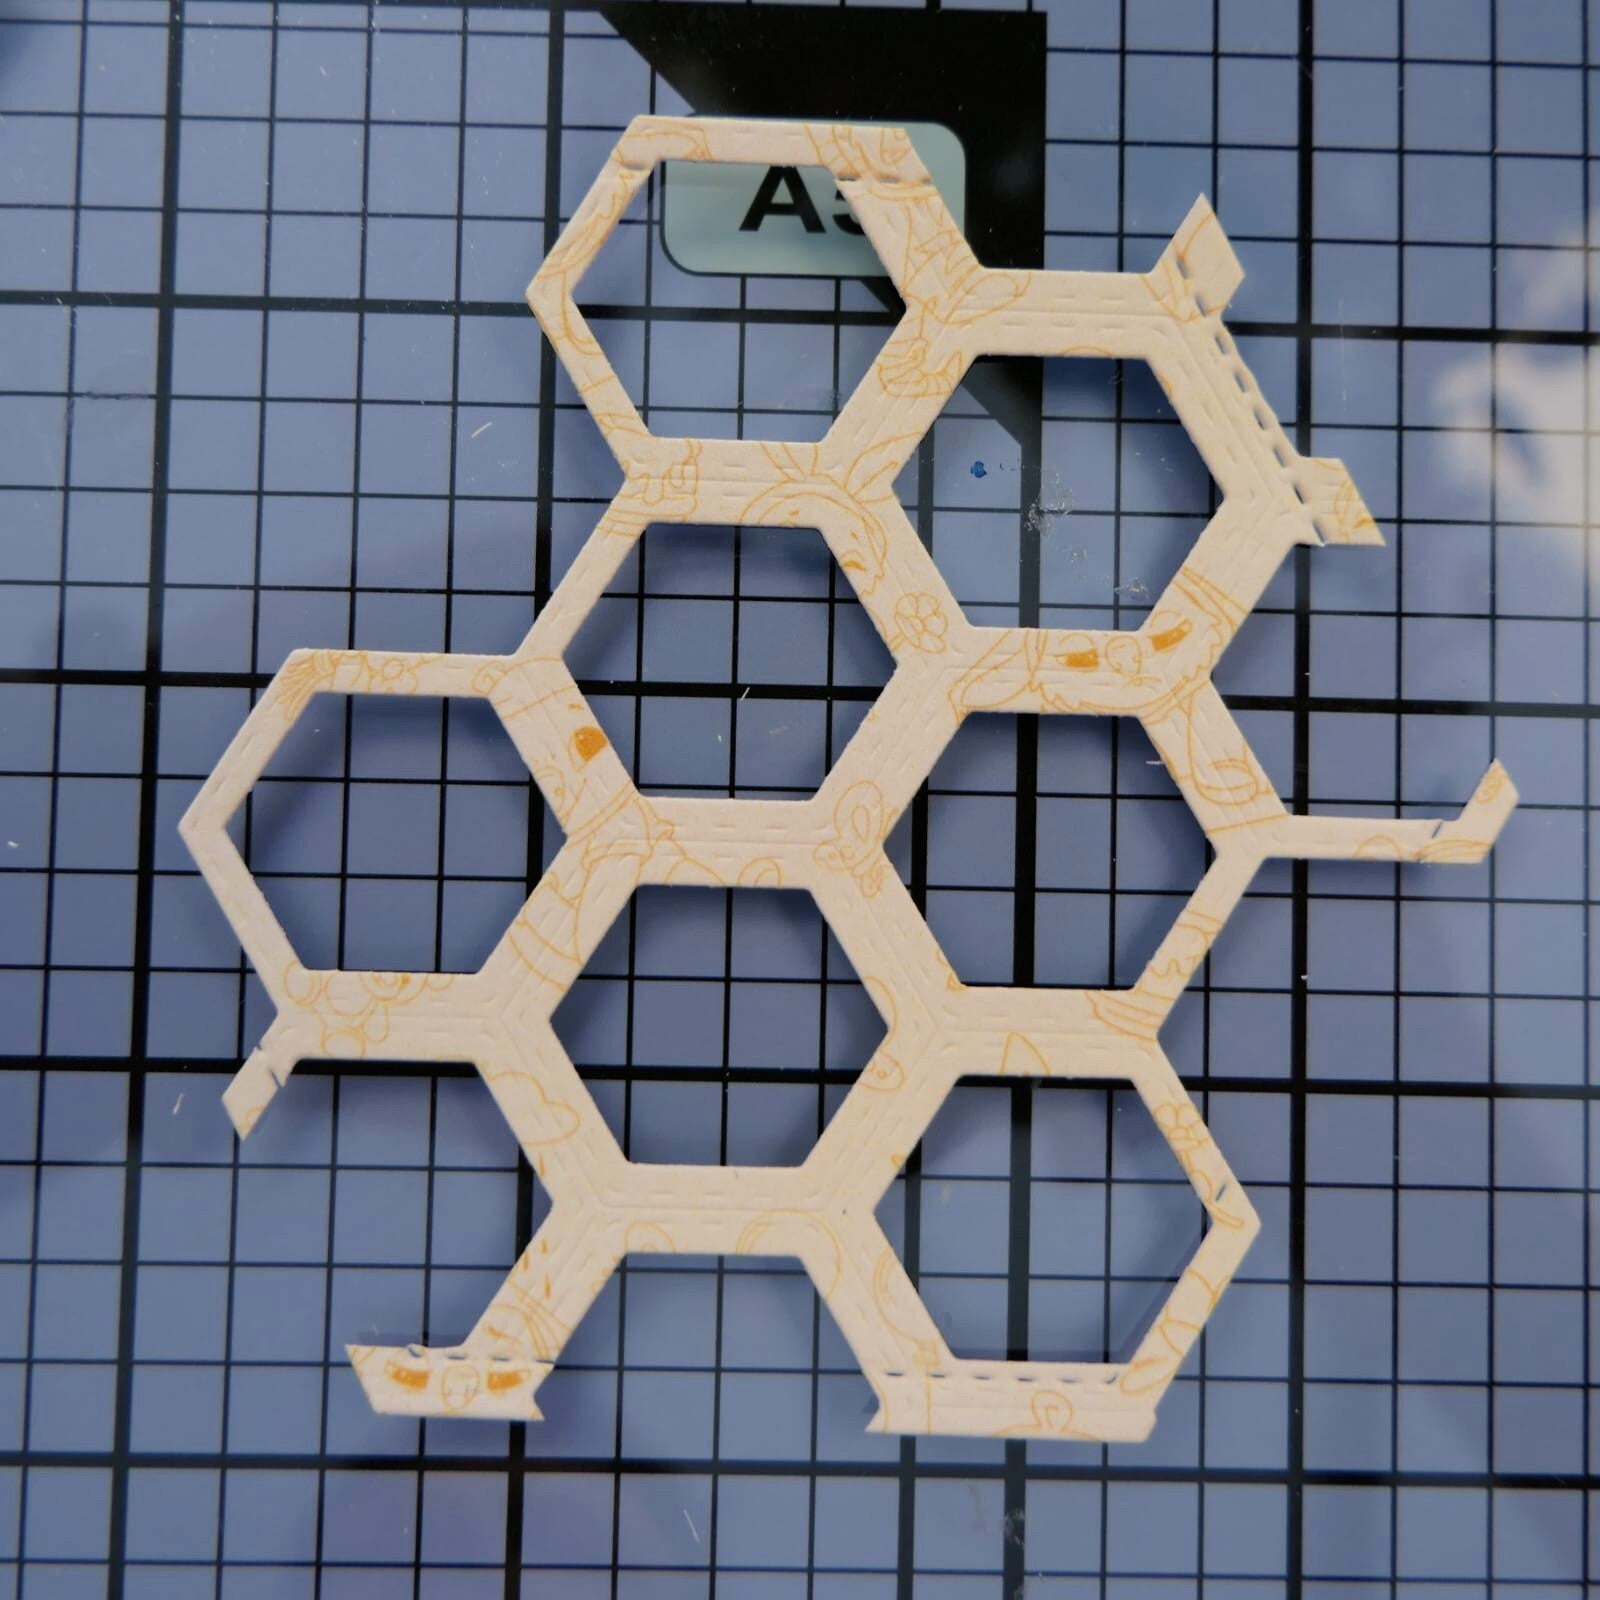
Die cut the Hundred Acre Honeycomb Background from patterned paper.
After that, cut it further using the second largest Stitched Nesting Hexagon die.
Creating the front opening
Take the second A2 card base.
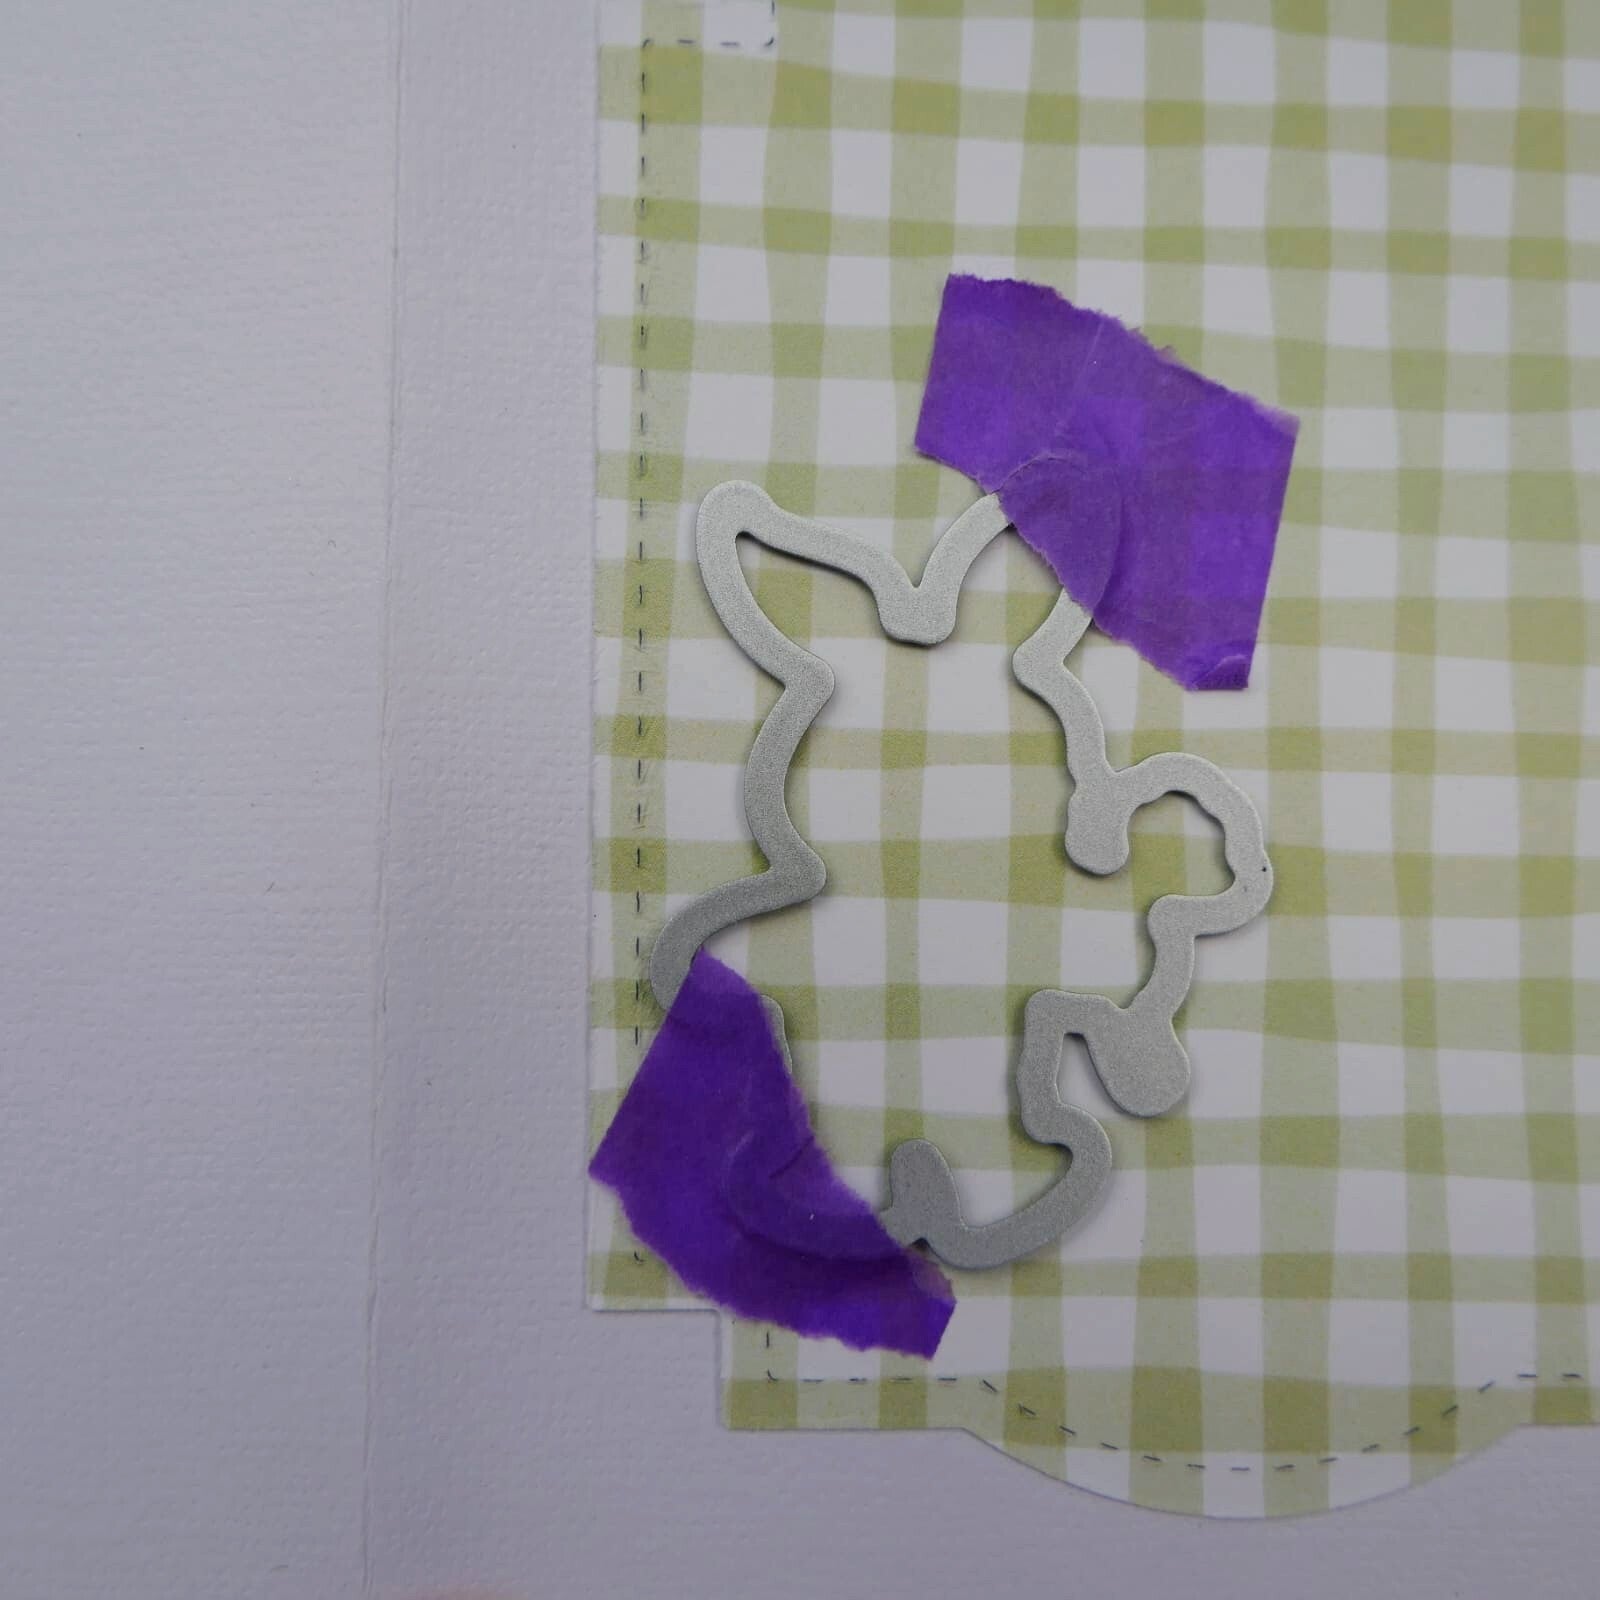
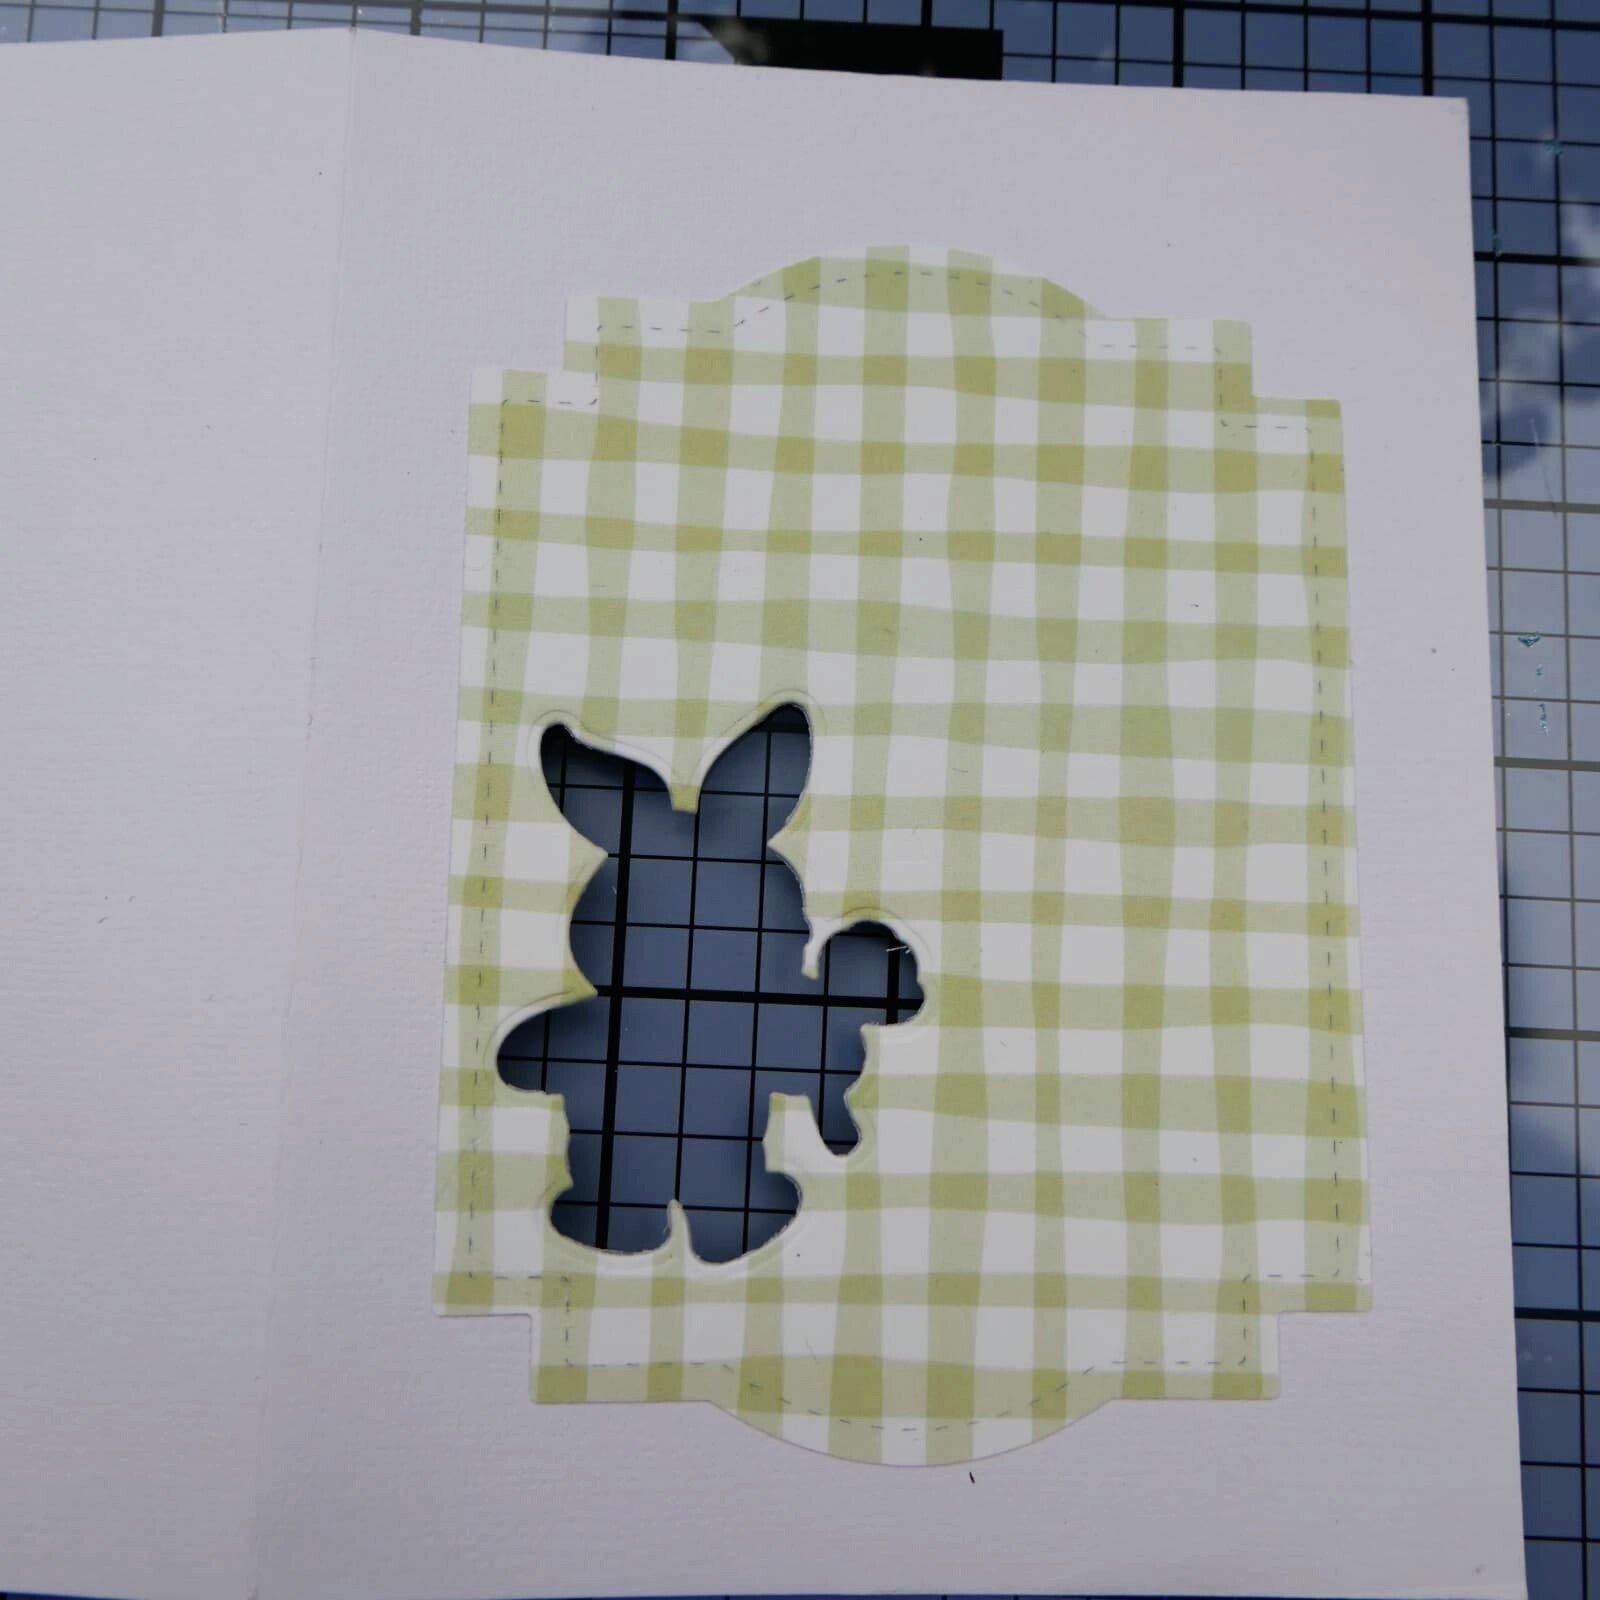
Die cut the Small Fall Frame Craft Die out of the piece of patterned paper and adhere this to the front panel of the card.
Now position the Piglet image temporarily on the inside scene, close the front card over it, and lightly mark where Piglet should appear through the opening. Once you are happy with the placement, die cut the Piglet opening through only the front panel. Put some temporary tape over the die so it stays put.
Tip: Always keep the card fold open while die cutting, so you only cut through one layer.
Decorating the front
On the front of the card, adhere the little bear for extra detail.
Prepare the Happy Birthday sentiment by die cutting it twice from white cardstock and once from vellum for the shadow.
Color one sentiment layer in two shades of blue.
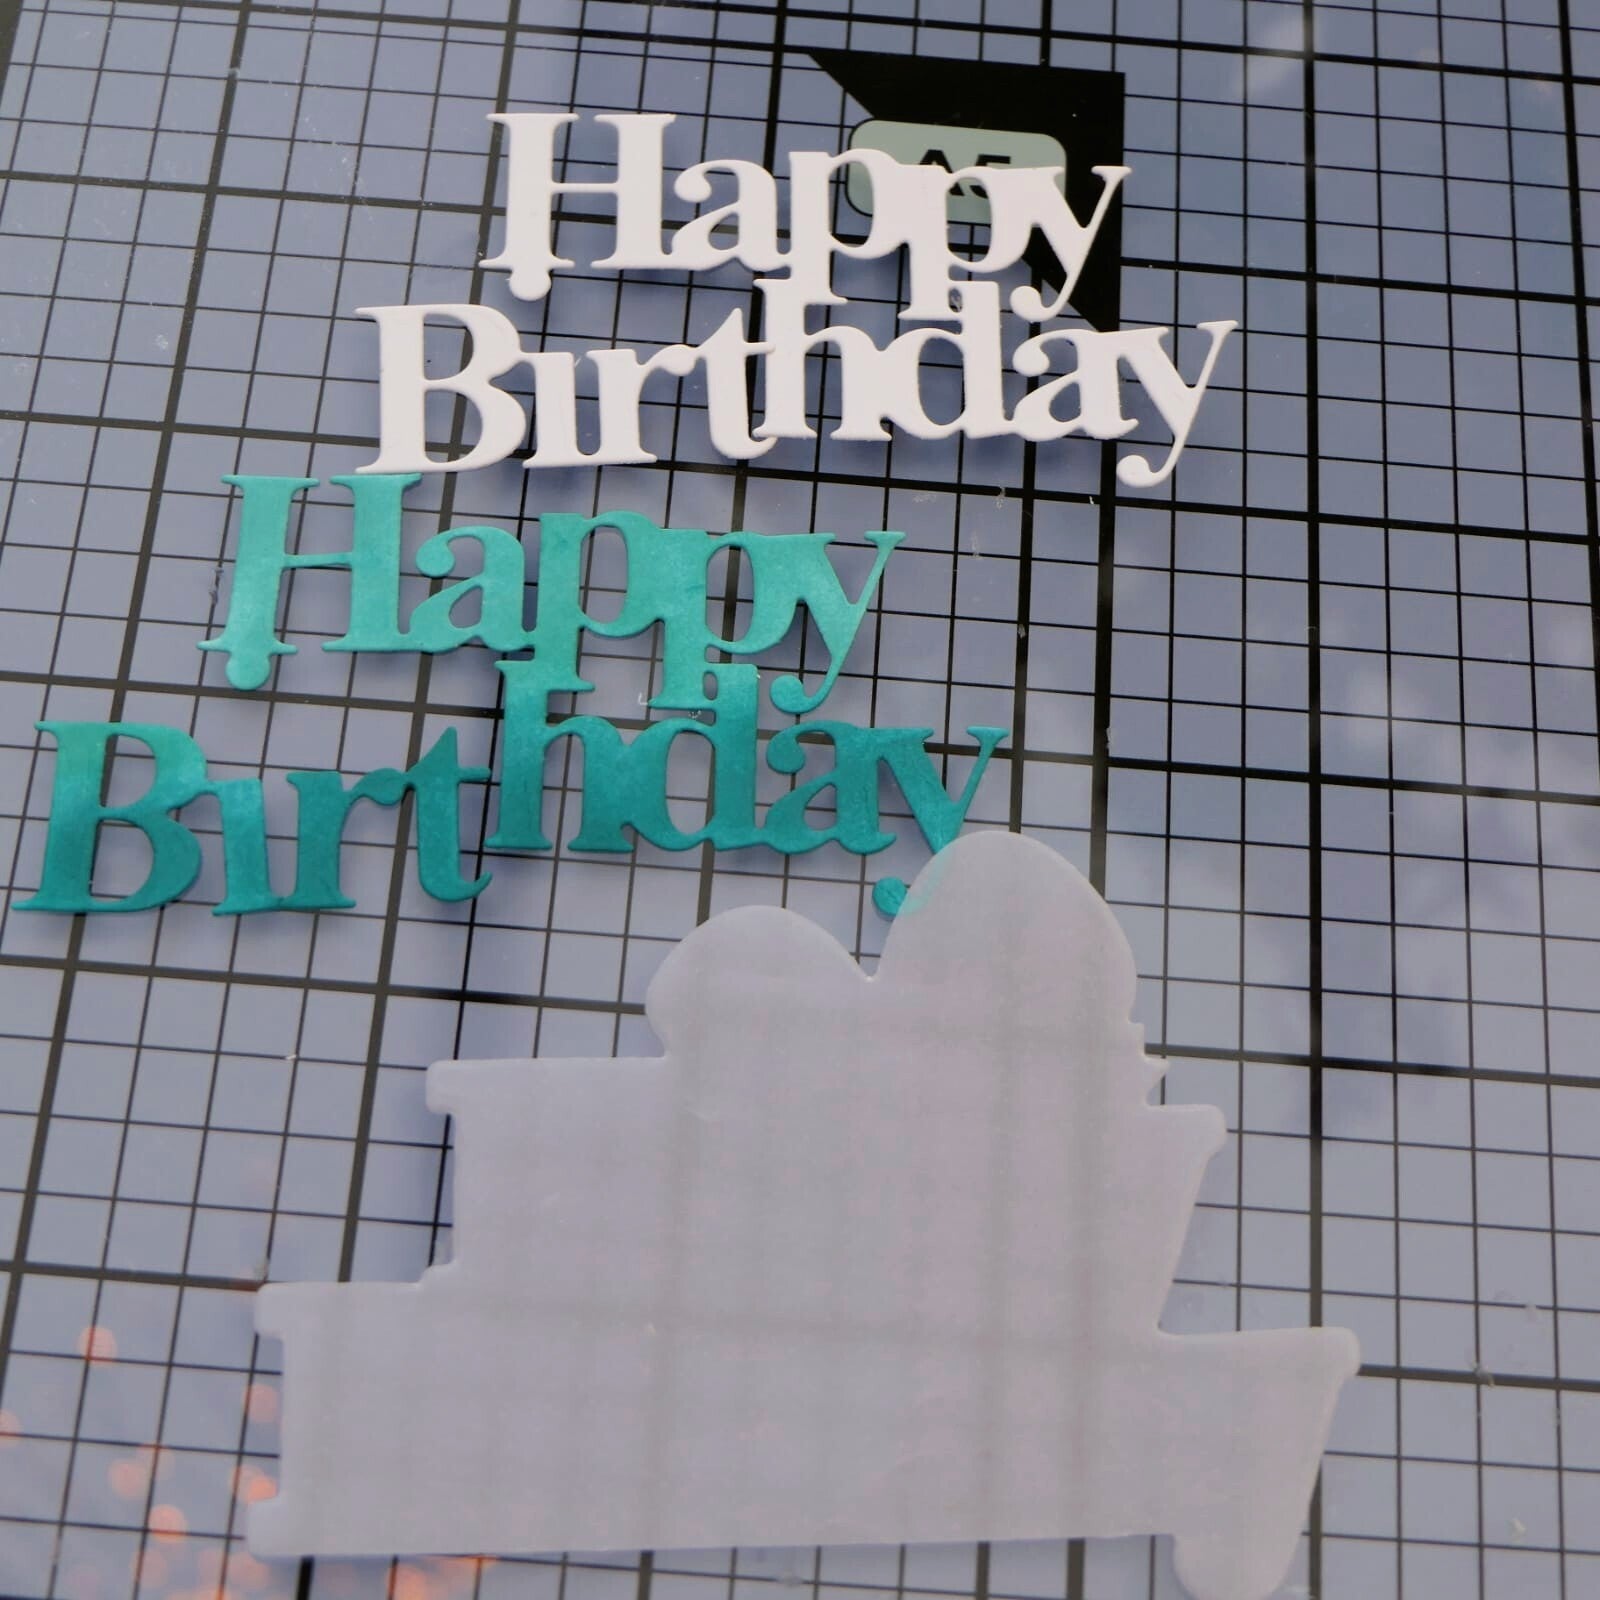
Glue the colored sentiment onto the vellum, then add the second white sentiment underneath so the vellum gives a softly raised effect.
Adhere the sentiment to the front and finish with Glossy Accents on both the sentiment and the little bear. you can best do this when the whole card is finished.
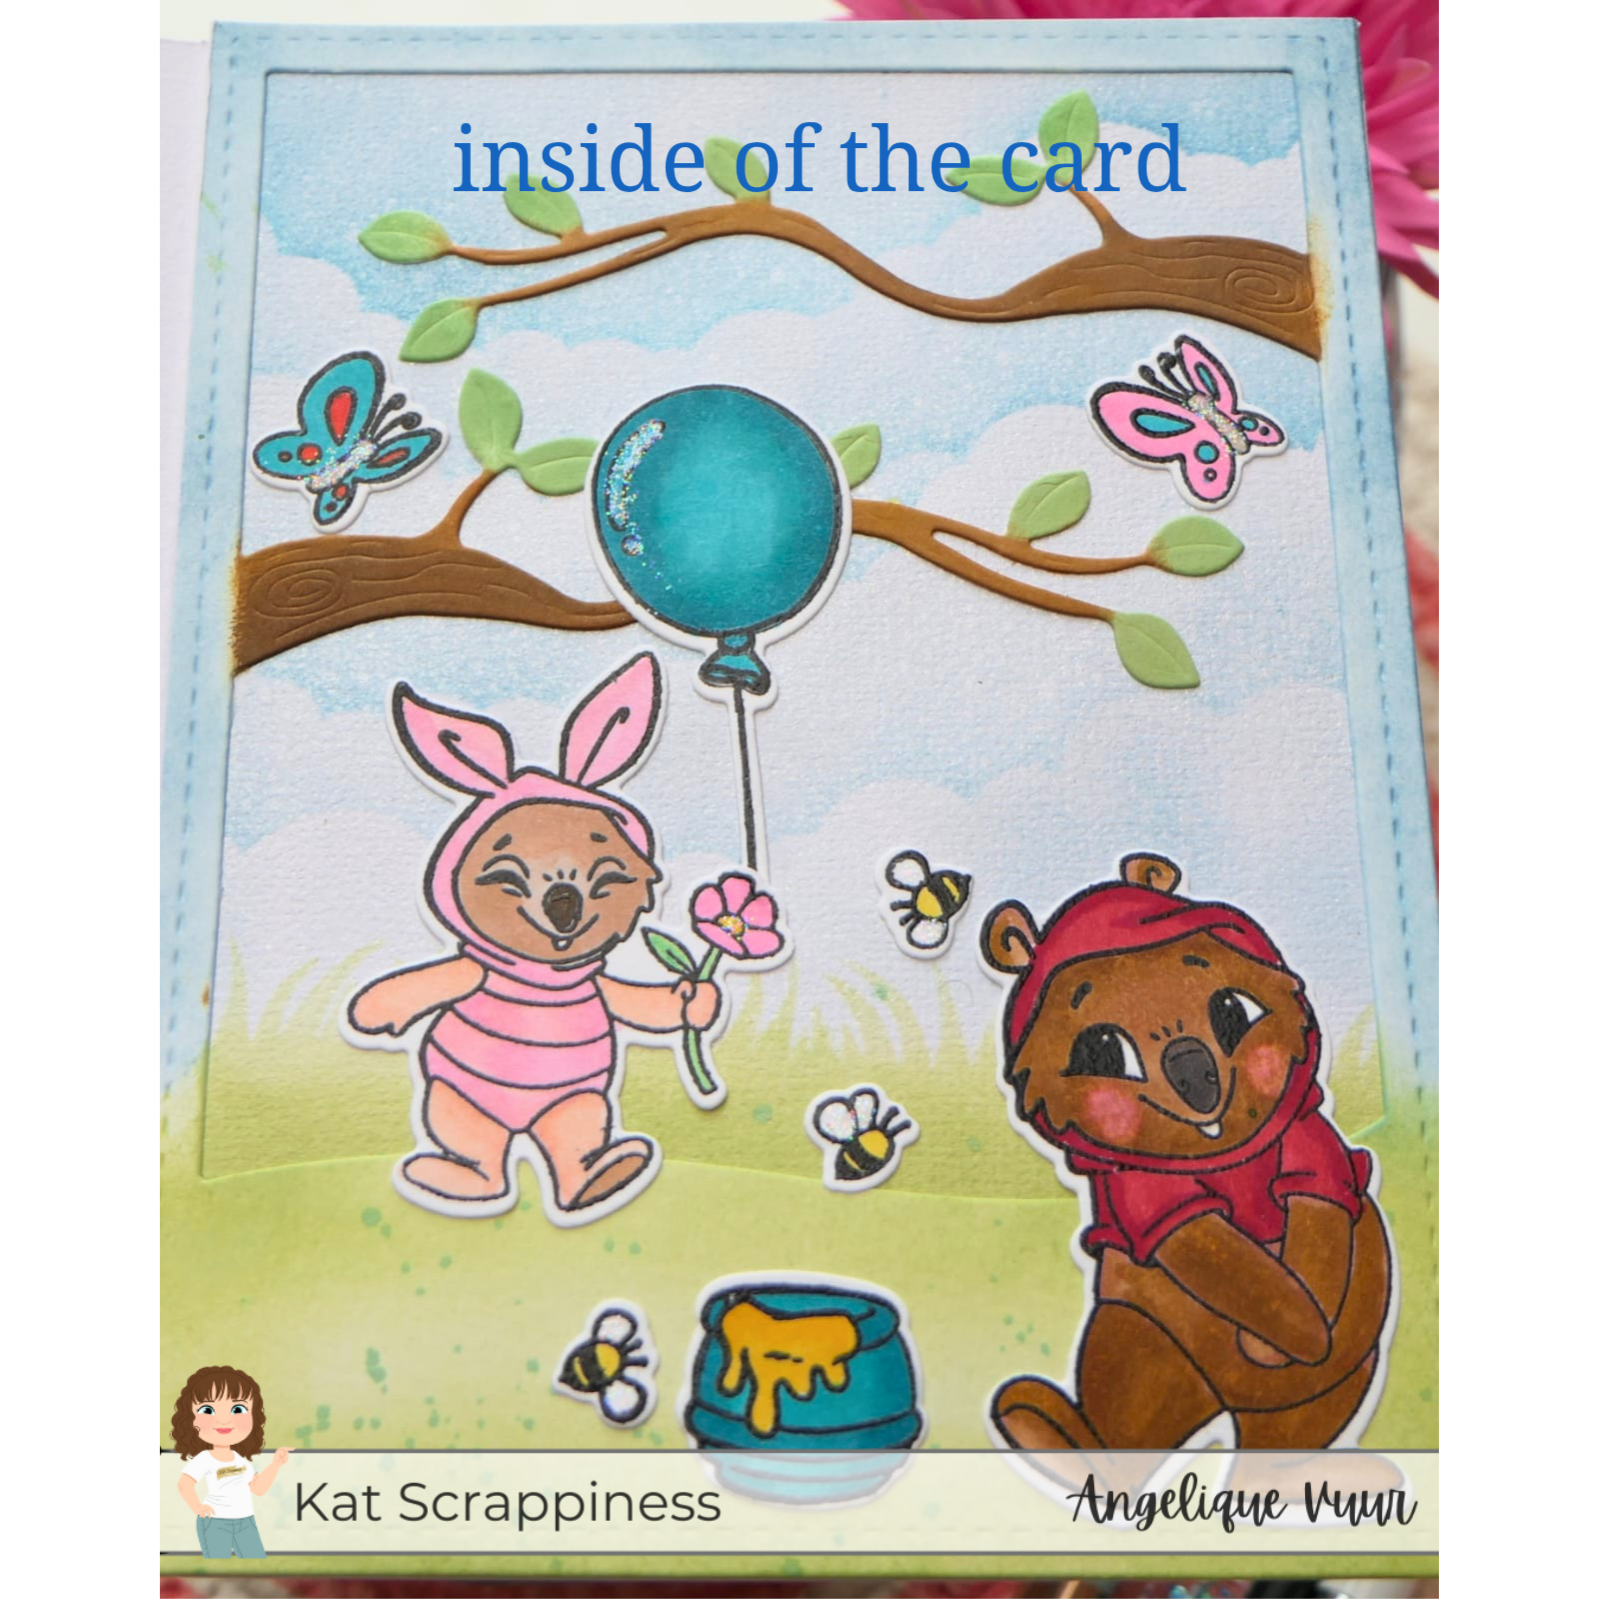
Decorating the inside scene
Now open the just decorated left panel of the card. Adhere the second cardbase, with the scene faced up on the right panel of the first card. See picture below.
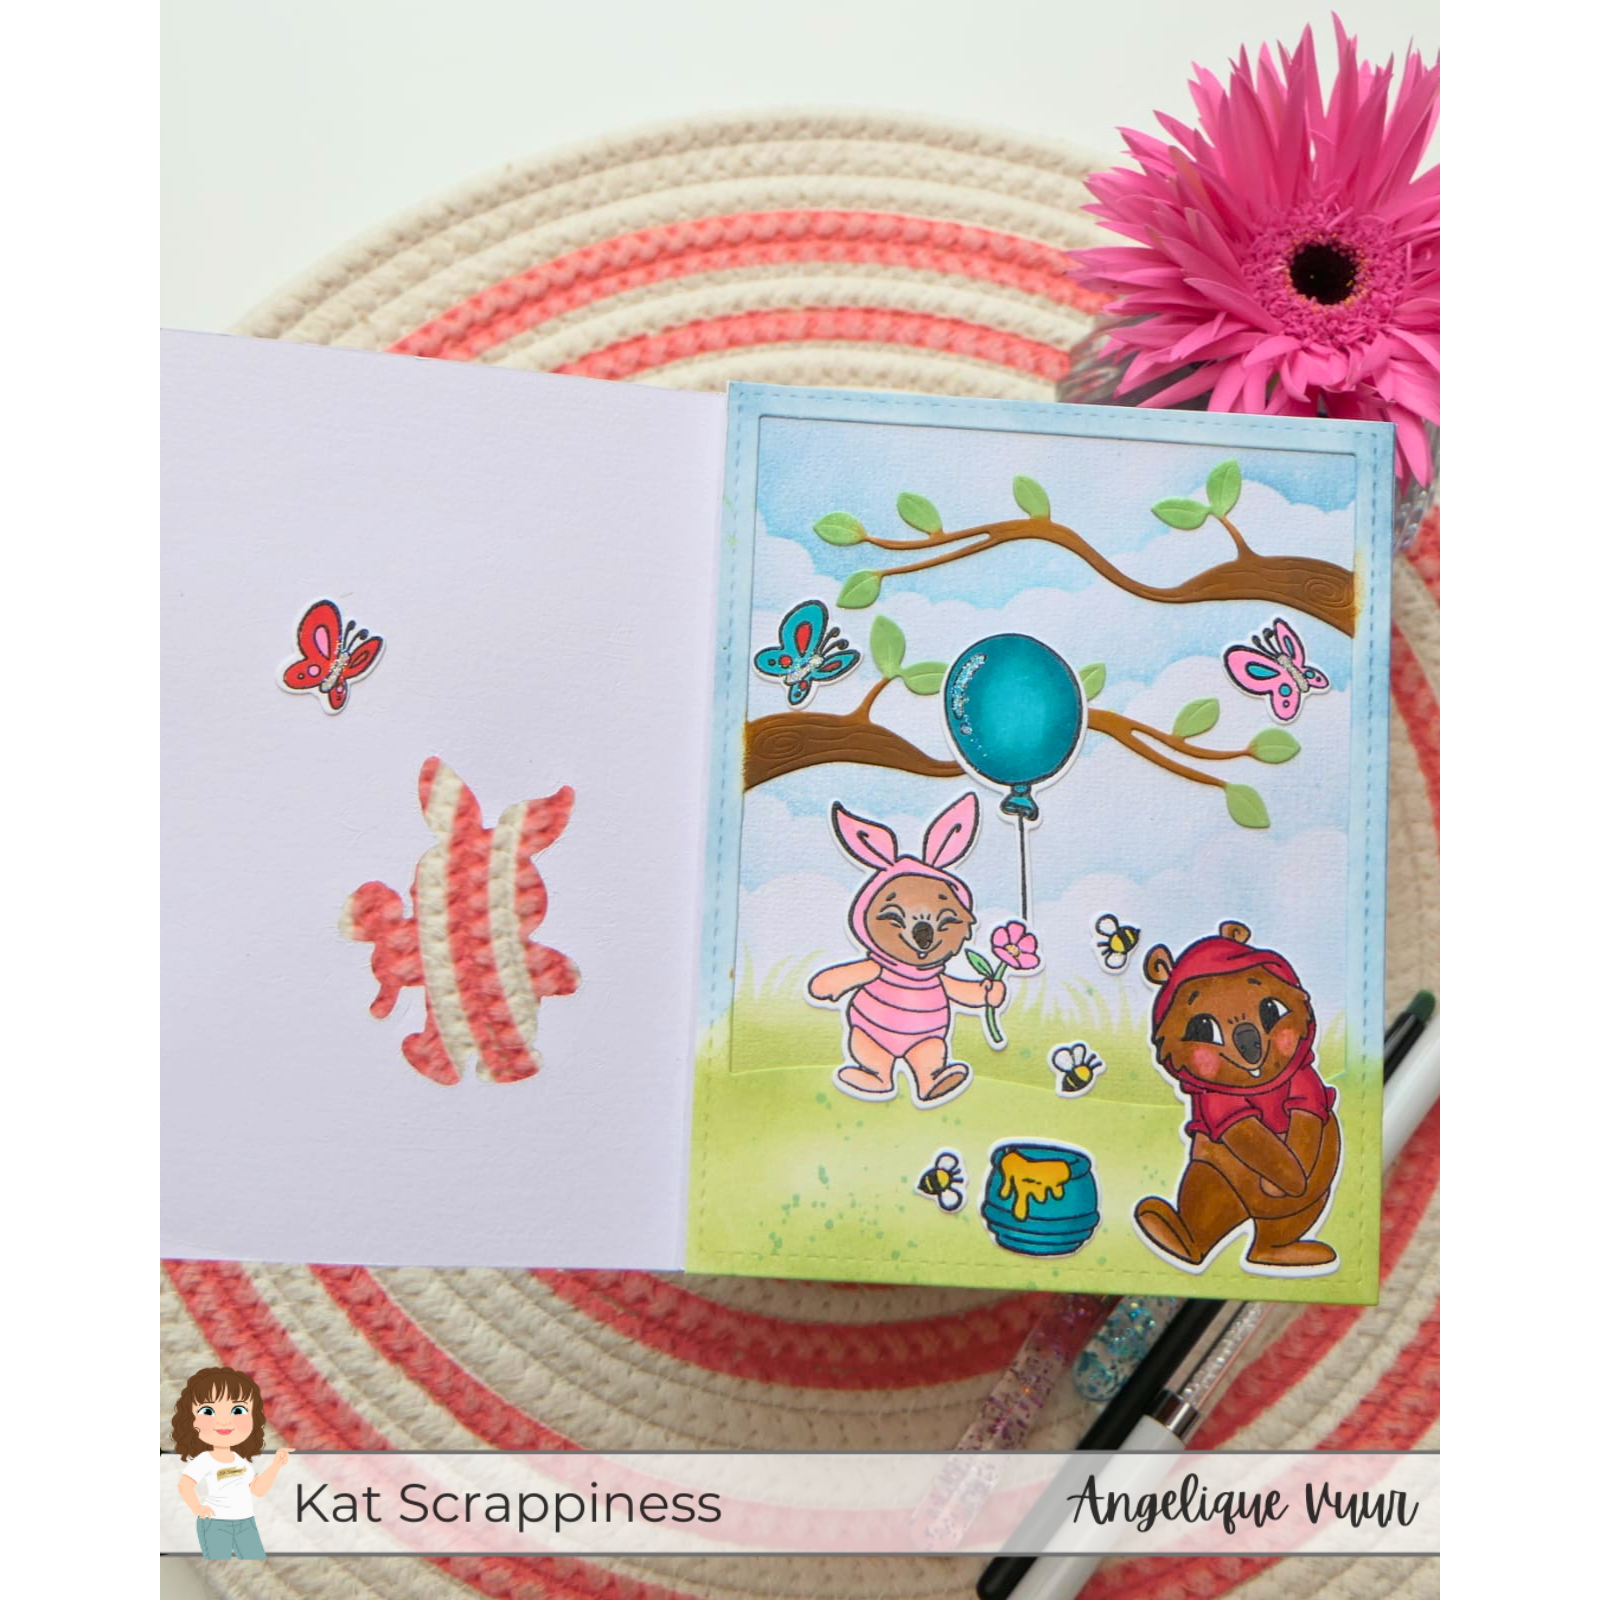
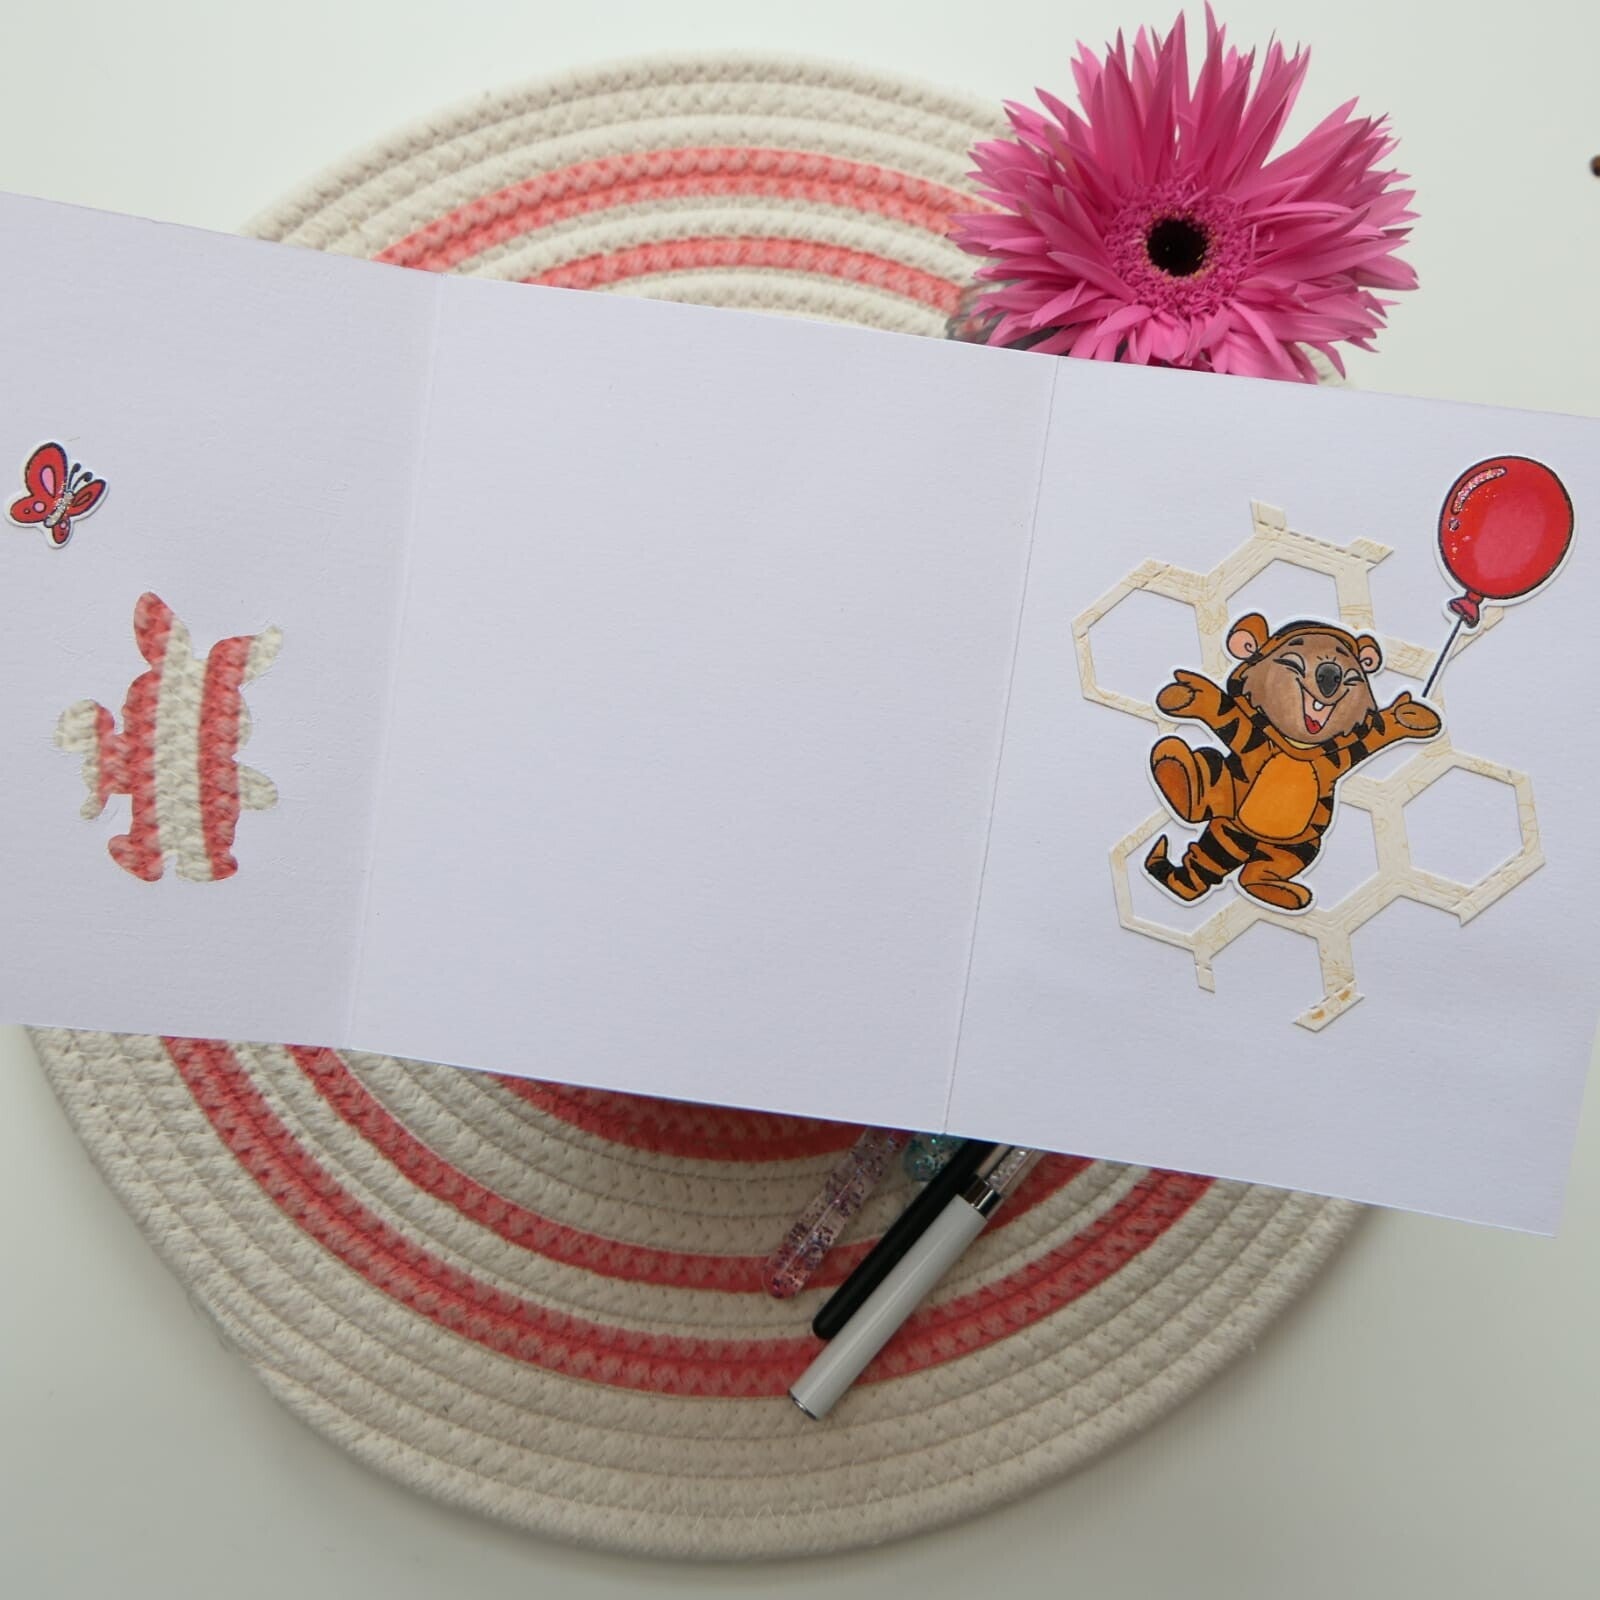
When you open the panel with the Scene on it to the right, you should see three panels:
- left white panel with the hole in it
- center panel, completely white
- right panel on which we go 97decorate a bit.
On the center panel, build your main scene using:
- Piglet, adhere piglet through the hole in the front panel.
- 1 balloon
- Winnie
- honeypot
- bees
- 2 butterflies
On the left panel, keep it simple with one butterfly near the hole of piglet.
On the right panel, adhere the smalle Honeycomb Die cut and place Tigger on top, with a balloon coming from his paw.
This creates a playful little story across the whole inside of the card!
Final Thoughts
This card was such a joy to make because it feels playful from beginning to end.
I love cards that look simple at first, but reveal more when you open them. That little surprise always makes a handmade card extra special.
And of course… these sweet quokka characters make it impossible not to smile.
I hope I’ve inspired you to create this fold card. With other stamp sets or themes you can easily adapt this, because the construction itself is very versatile.
Thank you so much for stopping by, and don’t forget to check out the new releases at Kat Scrappiness for more inspiration.
Until next time and happy crafting!
With love and creative joy,
Angelique 🤍
Add comment
Comments